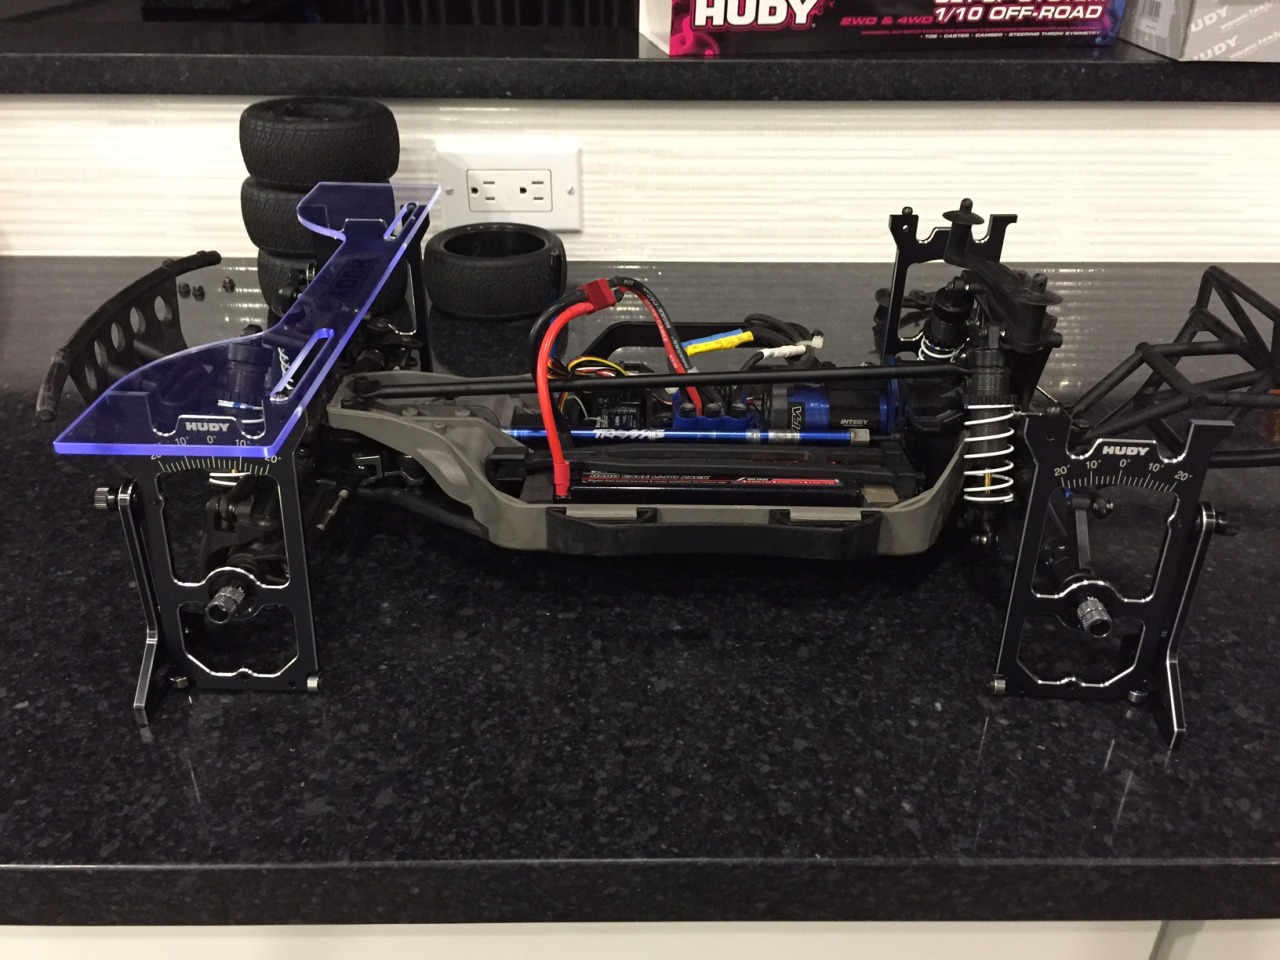
I’ve had the HUDY station for about a week, and got a chance to try it with my cars. I figured it was about time to do a review with it and give you my thoughts. The HUDY station is used to (primarily) set camber and toe for RC cars, and it’s a fairly expensive precision instrument. The build quality is quite high, but the price is also quite high ($150). There are a couple of other companies making similar instruments, but I’m sure the tolerances aren’t as good as this setup station. You do need high tolerances, because you’re trying to make very small measurements.I bought the 1/10 scale off-road station, aimed at 1/10 buggies. My Slash 4x4 also fit,but just barely. Anything with longer arms than a Slash is not going to fit, there was maybe a few mm of extra room. While I don’t know for sure, I suspect short course trucks with Slash offset wheels will fit (Tekno, HPI Blitz) and other trucks will not (Losi, Associated).To use it, you basically suspend your cars in the 4 hangers, and then you put the clear plastic top plate on top. The hangers will tell you the camber, and the top plate will tell you the toe .However, and this is a big one, you need to be very specific in the technique you use when measuring your car. Ideally you get droop blocks, which are aluminum blocks you put underneath the car, and press down on the car so that the arms simulate the ride height you normally drive your car at.However, they only make droop blocks in 10mm increments (10mm, 20mm,30mm, etc.), so there’s no way to get the exact size to set the car at the exact height you want to measure at. For those of you that have been paying attention, you’ll notice that your camber and toe change as the A-arms move through the range of travel, and no two measurements are the same if the arms are not exactly in the same spot each time.Tips:All RC cars have a bit of slop to them, especially in the steering, so you need to “drive the car forward” in the hangers a bit (I just drag them forward a little) to take up the slop and set the suspension and steering in where they would be when the car is moving forward. Have your radio on and the car on while you are doing the measurement to ensure your servo is centered in its normal spot. Else your steering will be slightly crooked when measuring.It’s a good idea to get the quick mount wheel nuts. You don’t have to, but they’re handy to use and won’t scratch the hangers. I bought the Arrowmax 4mm version, which is about 1/3 of the price ($7) of the HUDY version($20). I measured my Slash 4x4 and set toe and camber with a 9v battery used as a droop block. This looked like about the right height that I drive the car at. However, when using the car afterwards, there was about a 3 degree difference in rear camber and the front toe in was off by quite a bit, maybe 5 degrees? This is because the car naturally drives at a different setting than what I was measuring at, so you basically have to do a conversion between what it is in the hangers,and what it is on the floor. This mean that the next time I set my Slash, I want to set front toe at about 5 degrees of toe-in and -4 degrees of camber, to end up with 0 and -1 respectively.Conclusion:Overall, I think the instrument is a bit fiddly and time consuming. If you’re a super-dedicated racer, this is the most accurate instrument you can buy to set fairly critical parameters on your car. But for 95%+ of people, I think a basic camber gauge and eyeballing your toe is going to be faster and easier and get you close enough. Something like the DE Racing setup wheels is another option that is cheaper and probably a lot simpler and faster to use and I would guess is a happy compromise for the ones that want something more accurate than a plain ol’ camber gauge.Rating: 7/10
No comments:
Post a Comment
Note: Only a member of this blog may post a comment.
No comments:
Post a Comment
Note: Only a member of this blog may post a comment.