Saturday, December 31, 2016

Well, that was quick

I hit the track today with my B6 and Hyper TT to test out some VRP shock pistons and the new truck.  It was pretty much a disaster -- on the first lap I could tell my shock setup was totally wrong on the B6.  With the Hyper TT, I only did about 10 laps before I hit the wall in the high-speed sweeper and cracked the steering knuckle. 

Not a good day at all.  I've got some Integy aluminum knuckles on order, hopefully they will solve that issue and I can get the Hyper TT back on the dirt.


Hyper TTe all wired up

Got the electronics installed.  I was originally going to keep with the Asian theme and get all Chinese electronics, but considering the cheap Hobbyking stuff is only about 30-40% less than the good stuff and of pretty questionable quality, I decided to stick with my usual electronics.
  • Sanwa 1258-TG servo
  • Hobbywing Xerun SCT ESC
  • SMC 4500kv 4-pole 540 motor


Already glued up the tires, so just gotta finish painting the body and I'll be ready to hit the track.  Looking forward to seeing what this baby can do!

Friday, December 30, 2016

Ready to Rip!

My present from Santa finally showed up today --


According to the box, it's READY TO RIP  😂


Despite the picture of electronics in the box, this one requires tires, paint, and electronics.  Hobao calls it 80% ARR (Almost READY-TO-RIP).

I'm pretty excited about the truck, it was fairly cheap but actually seems to be of pretty good quality.  Of course there will be a review to follow...

Wednesday, December 28, 2016

3rd try's the charm

I spent a couple of hours doing some maintenance and cleaning up the wiring on my 22-4 2.0 for the third time, I think it's a little better now and should have a bit better weight distribution as well with the ESC in the back.  Still not perfect, but the RX-481 receiver is a little problematic because you need access to both sides of the receiver to get to the bind button and the connectors.

I think this is as good as I can get it.

By the way, for 13.5t motors, <-B (forward) seems to be the best rear belt tensioner setting.

Old:


New:

Sunday, December 25, 2016

Must've been naughty

I ordered a new kit from Tower on Tuesday for Christmas, and Santa amazingly delivered it on Christmas eve.  Unfortunately, when I opened it, I found a plastic model airplane instead.

That was a major bummer, I felt like a kid getting coal in his stocking.  Going to call Tower tomorrow, hopefully they can overnight it to me.

On the plus side, look for a new kit review in the new year!  Trust me, it's not something you're going to be able to guess.

Merry Christmas everyone, hope Santa treated you better than he did me!

Monday, December 19, 2016

Team Associated B6 / B6D flat arms vs. gullwing arms


I spent a few hours at the track today testing B6D flat arms vs. the B6 gullwing arms.  I normally run flat arms, but tried out the gullwing arms (and gullwing tower) with the exact same shock package, shock locations, ride height, etc.

The gullwing arms basically soften the front steering and smooths it out and makes it a little more linear.  It also makes it a little easier to drive.  What they do is stand the shocks up more, and keep the progression more linear by keeping the lower shock mount more inline with the upper shock mount through the arm stroke.  So there is not as progressive a spring rate as the outside arm loads up and compresses in the middle of the corner.

The flat arms provide more initial steering and corner entry bite, and are a more aggressive setup in my opinion.

Overall I found it a step backwards on our mid-high traction small indoor track.  Definitely on looser traction, you will want to go with flat arms for the steering.  I know the pros use gullwing arms on high-traction surfaces in mod, but for me, I like a lot of steering and have a more aggressive setup.

By the way, you can bolt on a different pair of arms, but it's not going to work out of the box.  With more hours of tuning, I'm sure I could get it working better, but overall my B6 is really close to my ideal setup right now and I went back to flat arms.  At a minimum, I found I needed to drop the inner front ballstud 0.5-1mm, as the softer front induces more mid-corner roll.

Friday, December 16, 2016

Welcome to my new home!


For those of you who have been following me on my old blog site, you'll know that I've since moved to Blogger.  All of the content has been moved over from the old site to this one as of today.

Why did I move?  Well, there were some advantages to Blogger, namely:
  1. Tumblr is owned by Yahoo which isn't really doing very well, and there isn't a whole lot of support on Tumblr.  The blogs look nice, but aren't very well supported.
  2. Easier user interaction.  It's really hard to post comments on Tumblr.  Nobody really has a Tumblr account, whereas Blogger is owned by Google and pretty much everyone has a Google account.
  3. I didn't like the way the archive works, it's hard to see a history of past posts.
Hopefully you'll enjoy this blog format better now that it's hosted on Blogger.  Let me know what you think!

Wednesday, December 14, 2016

Schelle Type 1 steering arms review


image

I got a tuning part in the mail to help with the 180 degree turns we have at my local track.  These are Schelle Racing Type 1 steering arms, and add a fair amount of Ackermann gain when turning, especially at full lock.  They pull the steering ballstud in a little bit and also forward a little bit, you can see the difference in the picture above.
I did some testing today, and they definitely help you finish the turn mid and corner exit.  They are quite aggressive, enough to the point where I was thinking about lowering my roll rear center a bit, but I like them basically as a bolt-on.  The geometry seems pretty good, stock Ackermann must be a little bit off, as even Associated makes a pair of +1 Ackermann steering arms.  Stock geometry induces a little bit of push in my experience.
Recommended if you need more mid and exit corner rotation in 180′s.  They’re cheap to try at $8.

Monday, December 12, 2016

Winter is coming

Well, actually winter is here.  With the onset of the rainy season, the indoor track stays damp and sticky all day long, even with minimal watering.  What this means is that slicks reign supreme, as long as the track is blown periodically.

I was working on my B6 with another racer, and he had some tips that worked out pretty well.  I normally run it in basically a dirt setup, with 23mm of ride height and a good amount of body roll, but I dropped it down to 21mm and lowered the inner rear ballstuds 1mm.  I also loosened the diff a bit because of all of the traction we have now.  These changes reduced quite a bit of push I was having mid-corner, as the rear was trying to push the front.

This dropped my B6 best laptime down to 16.9s.  My 22-4 2.0 is down to 16.3s, so the B6 is about a half second off of my wheeler.

I find the two quickest ways to get your car working better is to either have a faster guy drive it, or to drive a faster guy’s car.  It’s hard to know what you’re missing until you drive a better car, and then you have specific goals to work on.  After the faster racer drove mine, he realized how down on power his 17.5 Yokomo is compared to mine.  After I drove his, I realized how much better corner rotation he gets, with no push whatsoever, and how much better his shocks are setup.  I ordered some VRP pistons to try, and will probably be lowering the shock wt. a little bit.

There’s a few rookie races my son is going to do over Christmas break.  After that, I’m going to throw a 9.5t motor in the 22-4 and let ‘er rip!  The 13.5t motor is easy to drive, but I think I could lower my laptimes a little bit with a mod motor in there.

Tuesday, December 6, 2016

Why I sold my TLR 22T 2.0

I’ve been reducing the stable a little bit the last few weeks, and one of the cars I sold was my TLR 22T 2.0.  I had it for about a year and a half, and it was basically my project mule that I spent the most time and money modifying.

The main reason I sold the truck is that it’s likely a 3.0 will come out from TLR in the next few months.  And possibly an Associated T6 of some sort soon also.  But the other reason I sold it is that it wasn’t really the right platform to compete with here locally.

Where I live, the stadium track class is 13.5t spec, and the TLR is a bit too heavy in that class with the sideways battery Exotek chassis.  ROAR weight limit is 1700 grams for the truck, and my truck was in the high 1800′s almost 1900 grams.  Dropping 200 grams is pretty difficult, but losing weight helps a lot in a spec class, especially when very few trucks out of the box are anywhere near it.  So it would have cost a lot to get anywhere close to competitive weight wise.

I did like the truck, and it’s still one of the better ones on the market.  My TLR was extremely durable.  In a year and a half, and probably around 150 battery packs, I only broke one camber block and bent two turnbuckles.  That’s pretty much it.  The plastics don’t wear very well however, so I did replace all of the arms and steering components a couple of times in the life the of the truck.  The T2.0 was the first truck that TLR really optimized for mid-motor, and it ran fairly well.  I never quite got the front end grip that it seemed the Associated trucks had, but the Frank Root setup worked pretty well and it was pretty close to a perfect setup.

I also kept the truck for my son to race, but he moved on to the 22-4 2.0, and is faster with that, so I will be using that (cringe) for my son to race.  It’s just so easy to drive, but it’s definitely not as durable.  The T2.0 was a tank.

I still have a few sets of TLR wheels and have a full set of electronics ready for the next stadium truck to hit the market.  Who knows, I might even consider a Kyosho.  That’s a brand I’d like to try.

Monday, December 5, 2016

Leaky diffs

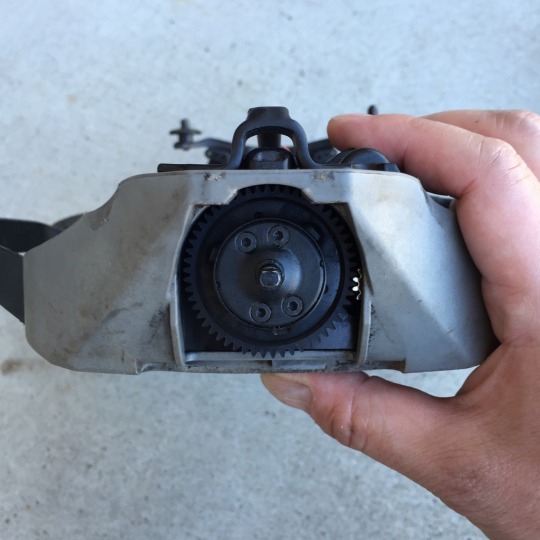
Well, I have about 50 packs through my 22-4 2.0, and the rear diff seemed a little light and the rear wheels were a little loose under power, so I opened it up. Getting to the rear diff isn’t TOO bad…

  • 3 screws on top
  • 4 screws on bottom
  • 3 screws on belt cover
  • 1 screw wire stay on servo mount
  • 2 nuts shock mounts
  • 2 screws swaybar

So 15 screws to get at the diff.  You don’t have to do the last two steps, but it makes your life a little easier to get the shock tower off to the back of the car.

Looks like the fluid had all leaked out, there’s not a whole lot in there so it didn’t really make a mess, but I’m guessing it will tend to leak through the o-rings if anywhere.  The only sign was a tiny wet spot on one outdrive.

The outdrives were on pretty good, so I ended up having to stick the diff housing in a vice and use a small flathead as a chisel to pry the outdrive from the housing.  I guess they were on a little TOO good.  I think motor spraying the black oxide parts makes them super clean for assembly, but they will tend to gall together.

One rebuild kit can service two diffs, which was nice.  Hopefully it stays together better this time.  I didn’t pop open the front diff, but I didn’t notice any leaking and it still feels pretty good.

Friday, December 2, 2016

Why I sold my Slash 4x4

My first RC car was a Stampede that I quickly turned into a Slash 4x4 LCG.  That truck served me pretty well, and at one point I had two Slash 4x4 LCG’s.  But I recently sold my Slash 4x4, and here’s basically the story on why.

The Slash 4x4 is pretty good in a few different ways.  Parts are cheap, and they’re plentiful and easily available.  That’s probably it’s strongest suit – Traxxas has the widest distribution network of any RC brand, you can basically pickup parts in every town.  The Slash 4x4 is also a versatile machine.  You can race it, bash it, turn it into a speed rig, crawler.  It’s basically a jack-of-all-trades.  But it’s also the master of none.

And that was basically the reason I sold the truck.  It’s a good learner vehicle, because parts are cheap and it’s reasonably durable.  But the plastics slop out ridiculously fast, and it’s really not that great of a race truck, even though I got it to handle pretty decently.  95% of my driving is on the track, and it’s not a very rewarding vehicle to drive.  It’s imprecise (steering slop and sensorless motor/esc) and coarse relative to race-bred machines.

There were a few other weak spots that drove me nuts.  The diffs leak basically no matter what you do and need to be rebuilt periodically.  The motor mesh was never that good, because of the floating nature of the spur gear.  Traxxas pinions are horribly bad, whatever pot metal they use sucks.  The truck uses a weird wheel offset that’s basically only shared with the HPI Blitz.

Even on the durability front, it really isn’t that tough compared to trucks like the Tekno SCT410.3.  The driveshafts and axles are pretty flimsy.  Plastic driveshafts?  Come on…

In the end, I lost interest in short course trucks, and the Slash became relegated to loaner duty.  But my son drives pretty well now, and so I no longer need a demolition derby loaner car.

It’s possible, though unlikely, I eventually end up with another short course truck.  If that happens, it will almost assuredly be a Tekno.  I’m strongly considering getting an EB48SL, which is an electric buggy easily convertible into a short course truck.  I’m not sure I want to make the jump to 1/8 scale, but that would be the most likely candidate.

Thursday, December 1, 2016

Changing of the guard

I sold a couple of my RC cars, the Slash 4x4 and the 22T 2.0.  They’re off to better and brighter places.  They were fun while they lasted, but those were the two cars I drove the least and I’ve been focusing my time on my B6 and 22-4 2.0.

I don’t know if I’ll ever own a Slash again, but I’m sure I’ll get another stadium truck sometime in the future.  Maybe when a T6M or 22T 3.0 come out.

I’ve got a B64D on preorder, so that’ll be the next car coming in.  I’m having so much fun with the 22-4 2.0, I want to see what Associated’s answer is.  There will definitely be a heads-up comparison between the two in the near future!  I’m not sure it’s possible to make a better driving car than the TLR, but I’m looking forward to seeing Associated try…

Tuesday, November 29, 2016


Did some racing Sunday morning. TQ’d 17.5 sportsman buggy and qualified last in a 4-man 13.5 truck class. Didn’t have time to stay for the mains, but pretty sure I would have finished first and last respectively.


As far as equipment, I finally manned up and bought an iCharger. I really should’ve done this a long time ago, but they’re pretty expensive and I’ve been putting it off. Preliminary results with some tired shorties at 40A definitely put some new life into them. If you’re serious about 17.5 buggy, you have to get one of these. Probably added about 10-15% more punch to my batteries.

Monday, November 14, 2016

0 rebounds

A quick little tip:  when building the front shocks on the TLR 22T 2.0, make sure you build it with zero rebound.  Otherwise you won’t get enough shock compression no matter what spring rate, kickup, etc. you use and it will act overly stiff.

Saturday, November 12, 2016

TLR 22-4 2.0 review

image

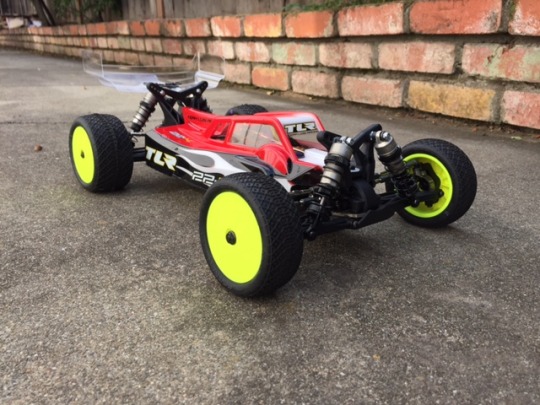
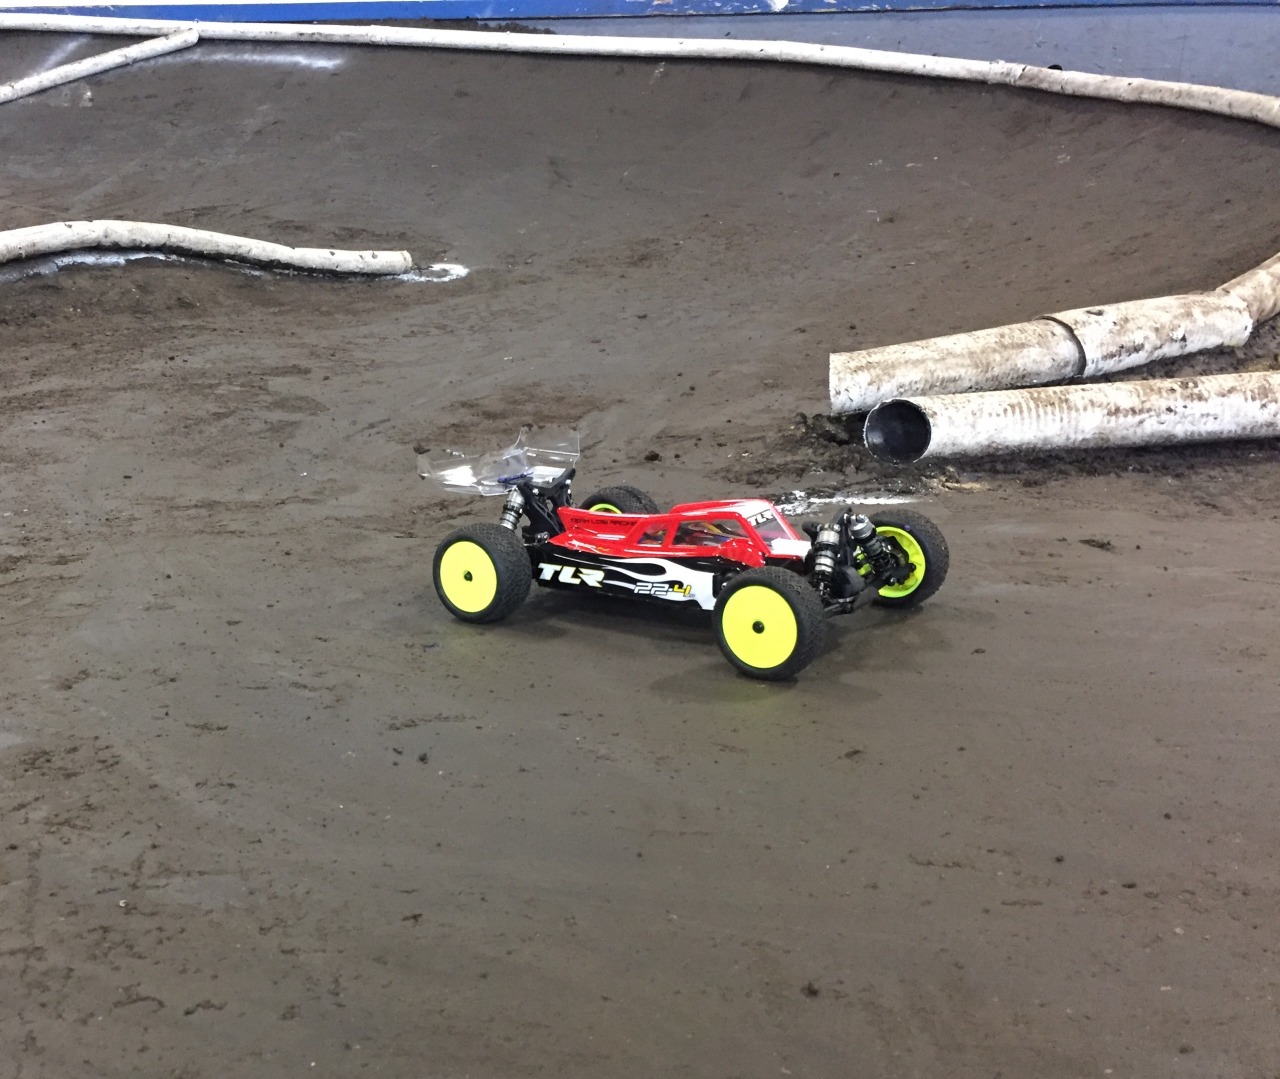
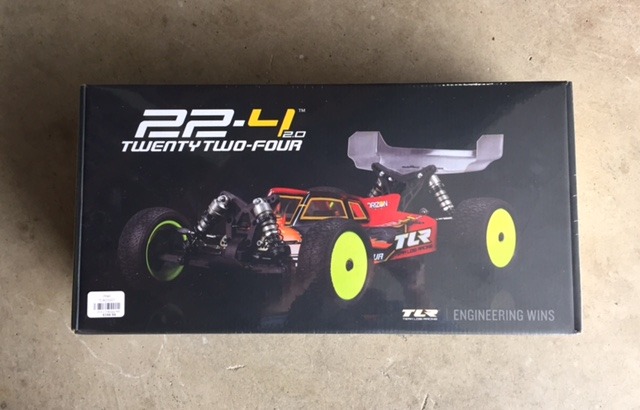
I’ve been thinking about buying a 4WD buggy for a while now, and got the chance to pick up a TLR 22-4 2.0.  Honestly, I was looking for a few things in a buggy – high performance, low price, and belt drive was something I was interested in because I’ve never owned a belt drive RC car before.  I was also looking for a car with a unique design and something fun to build.  The 22-4 2.0 met all of those requirements, and after building it and driving it for a while, here’s my review.

Overview:

The 22-4 2.0 is one of the few belt driven 4WD buggies on the market today.  Most cars have gone to shaft drive, and the belt drive is a bit of a throwback harkening to the Losi XX-4 and XXX-4 days.

It’s also a small evolution on the original 22-4 (1.0), and basically includes all of the option parts TLR found that made the original buggy better.  These include 12.5 degree caster blocks, a shortened chassis, cab forward body, shorty battery placement, CVD axles, 22 rear hubs and rear swaybar.  The other notable improvement is the addition of gear diffs.  TLR also redesigned the front end for more durability and the chassis for less flex.


Build: 8

I found the build to be relatively straightforward for such a complex vehicle.  The rolling chassis took me about 8 hours to build, and the electronics/tires/body took a few more hours.

The manual is clear and fairly accurate.  There were a couple of minor errors (one screw was missing in the diagram for step E-5 and one of the screw measurements was wrong (12mm instead of 10mm)), but overall I found it pretty clear.

There is a gear diff build video Frank Root has on the TLR Facebook page that I highly recommend you watch.  A couple of tips that will help is to always threadlock all metal to metal screws, and to clean off any black oxide steel parts with motor spray before you thread/loctite them in.  These include the set screws used in the outdrives and the gear diffs.  Doing these two things will greatly improve the likelihood everything stays together.

The 22-4 2.0 is a complex design, but the plastic and metal pieces all fit together with quite tight tolerances.  I’m pretty impressed with how the parts fit together so well, even though they are a bit of a jigsaw puzzle.  The manufacturing on these parts is top notch.

In terms of packaging, you have bags within bags within bags, but the steps flow nicely from A-G and there was no need to hunt through various bags to find parts – you got what you needed in each bag, and when you ran out of parts you were done with that step.

It would have been nice to get a few extra E-clips for the shocks or other small parts that are easy to lose.  The only extra parts were a couple of the jackshaft clips.  Not a big deal, but be sure you don’t lose anything while doing the build.

I would not recommend this buggy as your first kit, however.  It assumes you understand a few things that experienced RC drivers will know and doesn’t go into detail about things like how to set your slipper, or how to bleed your emulsion shocks.


Design: 3

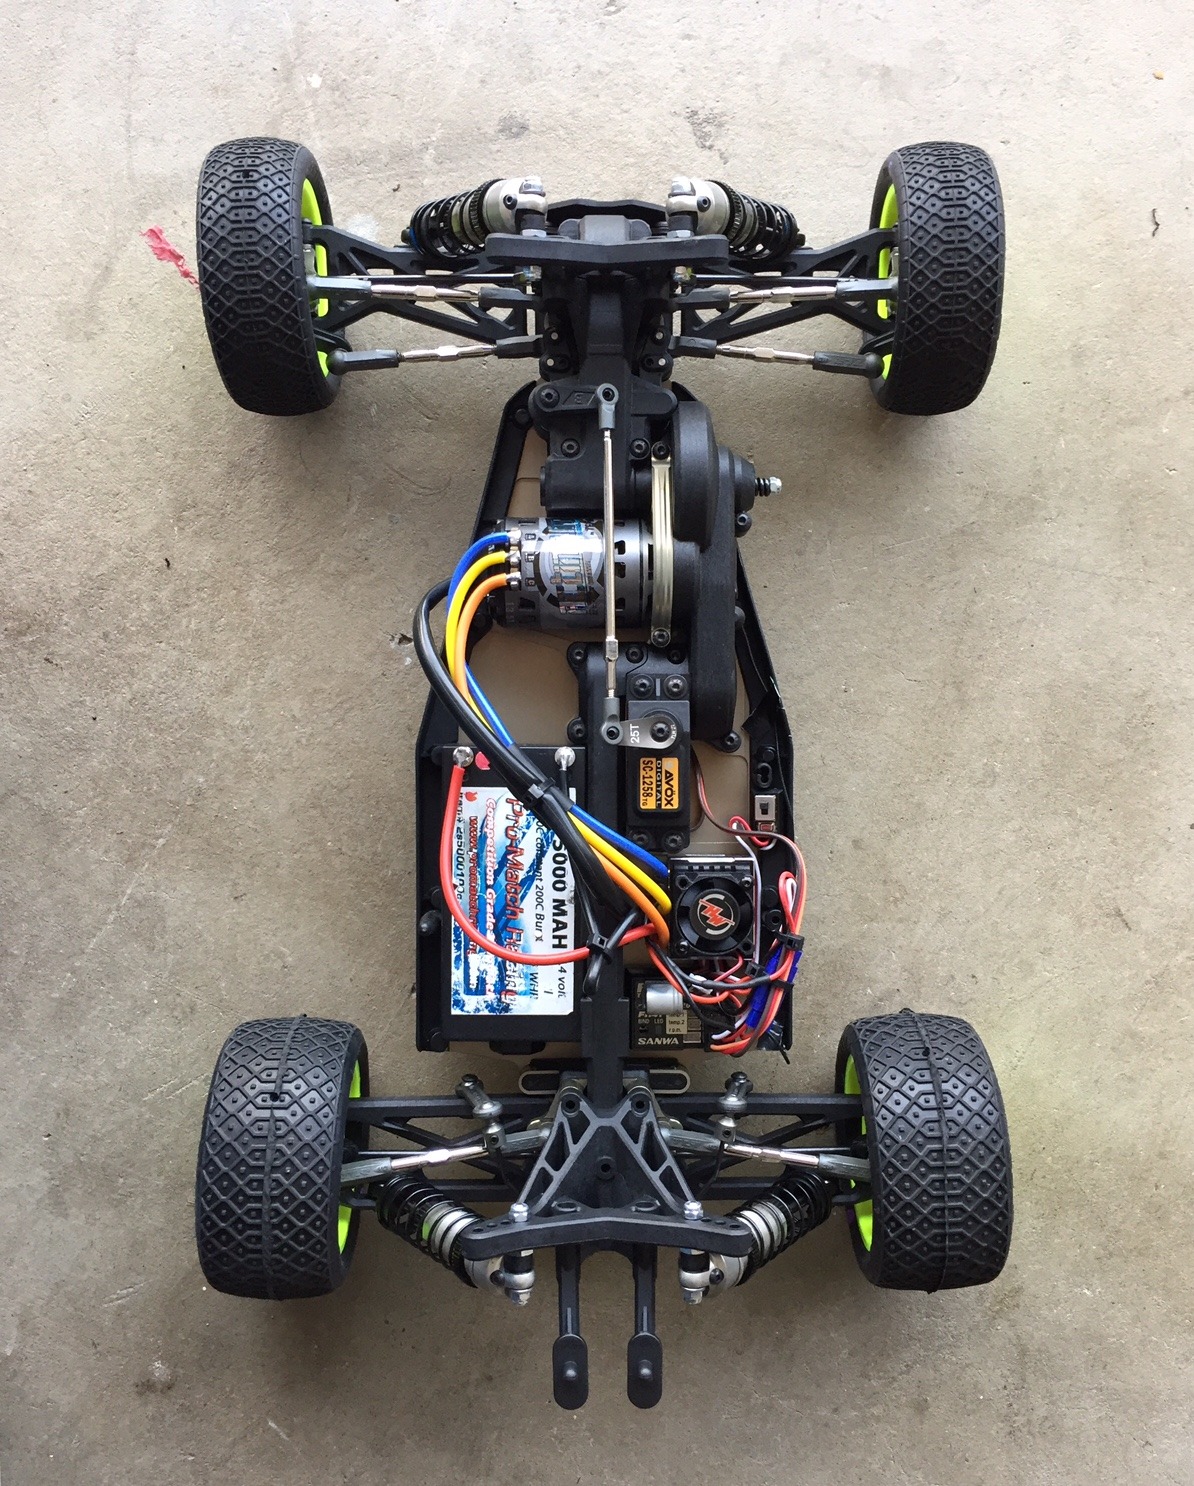
Let’s face it – the 22-4 2.0 is a complicated design.  There’s no way around it.  It’s clear they made a couple of basic architectural decisions – belt drive down the middle, saddle packs in the rear, and the rest of the design flowed around these decisions.

Once the basic battery layout and rear belt drive was decided upon, they had to put the motor in the middle, had to use a 3rd belt to connect the front and rear belt drives, and had to go with two jackshafts to connect the belts.

With the 3 belt system, that meant everything else (shock towers, steering rack, servo) had to be laid out around, on top, and in the case of the steering, through these belts.  This makes for a very cumbersome layout to get to individual parts (diffs, belts, spur gear, bearings), and maintenance on this vehicle is no simple task.

A lot of the parts are interconnected – to remove the center belt cover, you have to remove the front cover and the servo.  To remove the front cover, you have to remove the front shock tower.

Removing the rear cover requires removing the rear shock tower (4 bolts on the bottom and 3 on the top).  But oh, if you want to replace the belt, you need to yank the rear jackshaft, which requires removing the center belt cover.  Which requires removing… 

So not an elegant design.  It may actually be the most complicated 1/10 scale RC car on the market today.

The front belt is non-adjustable, and will need replacing when it becomes too loose.  The center and rear belts are adjustable, but they are inter-related, meaning when you tighten the center belt, you also loosen the rear belt.  So you have to be sure to compensate when you make changes.

On the plus side, the motor mount uses a neat eccentric motor plate that lets you adjust gear mesh just by rotating the plate.  Quite a clever design that I think is brought over from the XXX-4.


Performance: 9

Wow, does this buggy drive well.  Once you’re done with the build and get it out on the track, it makes you forget the complexity of the car, because it all just works together in perfect harmony.

The out of the box kit setup is spot-on, and basically perfect in my opinion.  It’s the best out of the box setup I’ve ever driven of any car, I literally felt no need to change anything.  It drives very smoothly, steers well, has tons of traction, brakes hard, rotates well, jumps well and lands well.  The shocks also have that typical TLR smoothness and plushness that are among the best in the RC world.

It has a tiny bit of nosedive, pretty typical of most 4WD vehicles.  The only 4WD buggy I’ve driven that had no nosedive at all was the Kyosho ZX-6, but the 22-4 2.0 has a minimal amount of nosedive and is better than most.

About the only thing I can say negatively about the driving performance of this vehicle is that it doesn’t handle bad landings particularly well.  If you land poorly on one corner/wheel, it has a tendency to flip/roll.  I’m not sure why this is or if it’s related to the belt drive system, but it’s there.

In addition to driving well, it is also very quiet.  The belts are by nature quiet, but the entire drivetrain is enclosed which keeps out dirt and noise.  The spur and pinion are also enclosed contributing to the silent running of this vehicle.

One thing to watch out for is that the belts take a while to break-in.  There is a lot of drag on the drivetrain before they break-in, which means your motor will run very hot for the first 15-20 packs.  I used an old 13.5t Team Powers motor I had lying around, and it would get up to 205 degrees for the first couple of dozen packs.  I recommend you let the motor fully cool down between packs, and maybe even gear down or run a fan.  You can also run the rear belt on the loose side (I went to the A-insert forward) for the first few packs.  The center belt is already on the loosest setting, per kit build.


Durability: 5

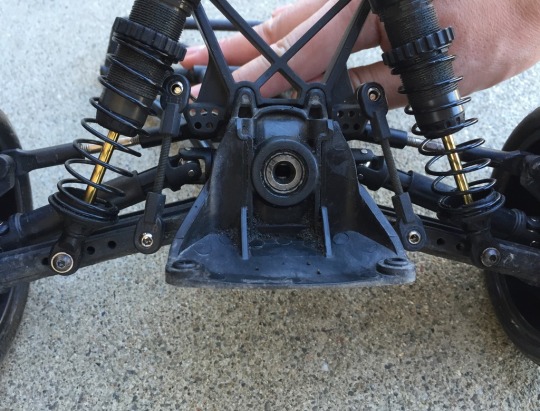
I haven’t broken any parts on my buggy yet, the durability actually seems very good so far.  TLR uses a lot of aluminum in critical crash areas.  There are reports that hard frontal collisions can break the front pivot brace, so that is a part you will want to stock up on, but I haven’t broken it yet.  I am only running a 13.5t motor.

But the reason I give the durability a middling score is because the TLR plastics are down compared to other manufacturers.  They used to be average in terms of wear and slop in my opinion, but the competitors have improved the wear of their plastics the last few years, and I would rate TLR plastics as definitely below average now. 
XRAY plastics are amazing, Kyosho plastics are solid, and  even Associated plastics are very good now.  You will want to replace the arms and pivot block periodically for optimum precision.

I ended up replacing the front plastic pivot brace after 40-50 packs even though it hadn’t broken, because there was a fair amount of slop preventing it from solidly keying into the chassis.

There is a fair amount of wear on the rear hinge pin brace and the end of the chassis.  I’m not sure if this will be a long term problem, but it’s quite a bit of wear for only a month of use.


Value: 10

There’s no doubt the 22-4 2.0 is the best-valued 4WD race buggy on the market today.  It includes basically everything you could want in the box.  The only optional part I added was aluminum rear hexes, and even that is not really necessary.

You get the full kit, a set of wheels, tons of aluminum parts (caster blocks, camber blocks, machined diffs, machined shocks), all fluids and greases, a precut body, and gear diffs for basically the lowest price on the market.  The 22-4 2.0 sells for $399.99, while every other race-level buggy kit is over $400 or even $500.

It’s an outstanding value, and considering it’s also one of the highest performing wheelers, you get that rare combination of extremely high value and performance.


Support: 8

The 22-4 is not a super popular vehicle, but TLR will post setup sheets from time to time and their staff is always available on social media and online.  They definitely are responsive to issues (the first batch of kits had CVD problems that they sent free parts out for), so I have to give them props for the great service they provide.


Dislikes:

Really the main complaint with the 22-4 2.0 is the difficulty with which it is to maintain and service the drivetrain.  Within the first couple of sessions, I wanted to inspect the belts for tension, and getting to the belts entailed basically tearing the whole car apart.

A well-known sight to 22-4 owners:

image

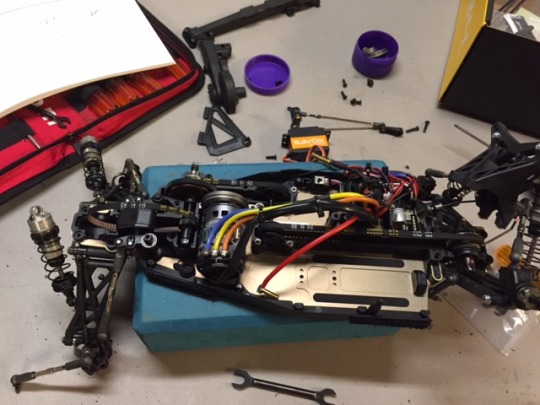
If you don’t like working on your car, then this is not the right vehicle for you.  A power screwdriver is a must, as well as a good parts tray organizer.

There are still some SAE nuts and bolts on this vehicle, which is a bit of a letdown.  Some of the bearings are also SAE, and you need a 0.05″ hex driver.  Not a big deal, just something to be aware of.  One day TLR will go fully metric, and the world will rejoice!

The front wheel nuts are really slim, they only engage on 3 or 4 threads of the front axle.  I replaced them with some longer ones because my hex driver barely grabbed onto the nut.


Conclusion:

The TLR 22-4 2.0 is an amazing buggy.  It’s an intricate design requiring you to keep on top of maintenance, but if you’re willing to deal with the pain, you get an outstanding vehicle that drives at least as well, if not better than its competitors.  And at a lower price.

It’s not unlike owning an Italian sports car or dating a supermodel.  Yeah, there are times you want to bang your head against the wall, but once you take it for a drive, you forget all about it and enjoy the ride.

Friday, November 11, 2016


Got a pretty giant wiring mess in my 22-4, and this is after cleaning up!  I just have a ton of electronics in the buggy.
From top to bottom, left to right:
  • Motor with 3 motor wires and sensor cable
  • Temperature sensor
  • Motor fan
  • Battery, positive and negative wires
  • Servo
  • Transponder
  • On/off switch
  • ESC with fan
  • External capacitor
  • Receiver with antenna
  • Voltage sensor

Monday, November 7, 2016


Got to run a few packs through the 22-4 2.0 today. No review yet, but I’ll just throw out a few thoughts. Smooth. Quiet. Kit setup dialed. Front wheel nuts suck.

Sunday, November 6, 2016

Saturday, November 5, 2016


TLR 22-4 2.0 build is pretty much done, just gotta paint the body and it will be finished.  It was a fun build, not as hard as I thought it would be, and didn’t take that long for a relatively complex vehicle.

Monday, October 31, 2016


I’ve been thinking about getting a 4WD buggy for a few months now, it’s the only 1/10 scale class I haven’t owned.
There are a lot of competitive wheelers on the market today, nearly all of them are good.  They each have their pros and cons.  Of the ones on the market:
  • Team Associated B44.3 - this buggy is ancient, is non-metric, and is likely to be replaced soon by a new platform.  It’s also the least competitive buggy on the market and has a fair number of issues I didn’t want to deal with.
  • Xray XB4 - a very good buggy, but quite expensive and Xray updates their vehicles every year.  I wanted something that wouldn’t be outdated in 6 months.
  • Hotbodies D413 - unfortunately the parent company has financial issues, and it’s not very well supported in terms of replacement parts.  It’s also 3 years old at this point.  Still a good buggy, but I was looking for something newer.
  • Kyosho ZX6.6 - not quite on the market yet, but the very high price tag ($579) put it out of reach of what I was able to afford.  It also comes with ball diffs and I was looking for gear diffs.
  • Yokomo YZ-4 - I don’t know much about this buggy, but it’s difficult to get parts in the U.S.  I believe only Amain can get parts for this buggy.
This pretty much left the TLR 22-4 2.0 as my main choice.  It is a complicated platform, and the belts need to be replaced frequently, but it is supposed to drive very well and I was looking for a fun build. 
A Halloween sale at my local hobby store and the buggy coming back into stock sealed the deal and I am now a proud owner of a TLR 22-4 2.0.  It will probably be a week before I am able to build the buggy, but stay tuned for a review in a month or so.

Saturday, October 29, 2016

Halloween weekend racing

It’s been months since I last raced, but there was a special Halloween race on Saturday night, so I got to race 17.5 2WD buggy and 13.5 2WD truck. 

In buggy, there were 3 mains, I qualified 3rd in the B-main with my B6, and finished 3rd.  Probably could have finished 2nd and moved up to the A-main, but really didn’t focus on my driving and crashed a few times.

In truck, I qualified 3rd overall (only one main) with my 22T 2.0 and finished 3rd, which was pretty much where my speed was at.  The kids that finished 1st and 2nd were a lot faster, so there was no way I was going to finish higher than 3rd unless they did something ridiculous.  Truck still had new tires that weren’t really broken in, but I drove a pretty clean race.  Overall times were about a half second/lap slower than my 17.5 buggy.  I have a few thoughts on setup that I think could improve my times by a few tenths.

Overall I had a great time.  I’d like to get out more, but weekend races are few and far between.  Almost all the racing is on weekdays.

Thursday, October 27, 2016

Challenging conventional wisdom: ride heights

I was at the track today getting my buggy and truck ready for a race this weekend and was doing a bit of testing/last minute tuning.  At my local track, when the surface is perfect (damp, blown off, and clean), Proline Primes work the best.  When the track dries out and gets a little bit dusty, Proline Electrons are my go-to tire.  (Note:  I’m not sponsored by Proline, these just happen to be the tires that I’ve found to work the best).

So I was at the track running Primes on my B6, and then as conditions worsened, I switched to Electrons.  And you know what, my buggy was still dialed and railing around the corners.  Great!

After another pack, I brought my buggy in and re-checked ride height, and it was off by about 1.5mm (too high).  OK, well the Electrons are a little bigger in diameter, no big deal, so I lowered the buggy back down and sent it out again.  Now the buggy drove like crap, and it got me to thinking about why.

If you think about ride heights, serious racers re-check and re-set ride height before every pack.  Why?  Because they want to maintain as much consistency pack to pack as possible, and they have their super-duper-awesome-dialed-magic setup that works perfectly at 23mm of ride height.  With Proline Primes.  (I’m using Primes and 23mm as an example, because that’s what happens to be in my setup).

Now when they switch tires, they re-check and re-set their ride height back to 23mm.  Why?  They already have their magic setup, but there’s nothing magical about the number 23 – it’s the configuration of everything working in harmony with each other (camber, links, toe-in, springs and oils, etc.) that produces the super-dialed setup.

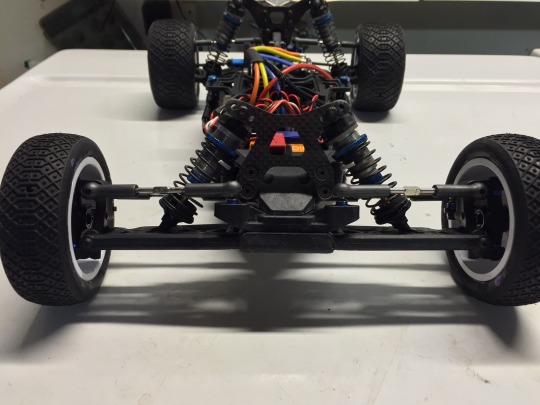
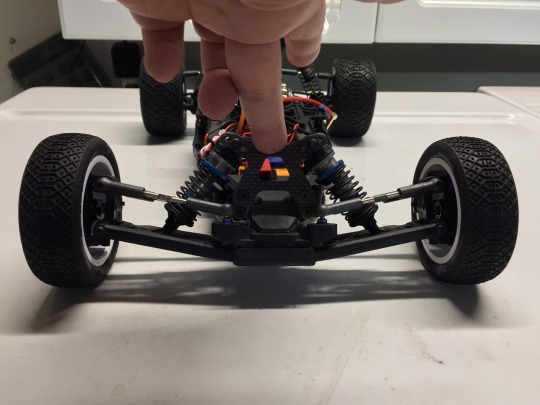
When you raise or lower your buggy, even a mm or two, you are also making mild adjustments to the camber, roll center, bumpsteer – basically EVERYTHING.  To prove my point, take your buggy and put it on the table.  Now raise or lower it a mm or two, you’ll notice that the angles of every adjustment changes very slightly.

So after changing tires, by re-setting your ride height to that magic number of 23mm, you’re actually making the car less consistent and actually different than it was with the original tires.  You’ve completely gone against the original goal of why you were setting your ride height before every pack.

So try this:  next time you switch tires, DON’T re-set your ride height.  Don’t change a thing.  Take off the old tires, put the new ones on, and just drive it and see what happens.  I think what you’ll find is that the car drives more similarly to how it did with the old tires, and will behave more consistently with what you’re used to.

Monday, October 17, 2016

Team Associated B6 aluminum steering rack, bellcranks, servo horn review (ASC91669, ASC91668, ASC1366)

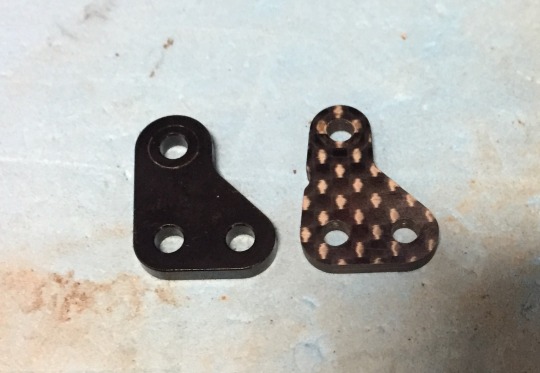
I noticed the stock plastic steering rack and bellcranks had a lot of
slop in them, so I decided to try the aluminum rack and bellcranks.  
The aluminum pieces are a little more precise and got good reviews online.

image
image

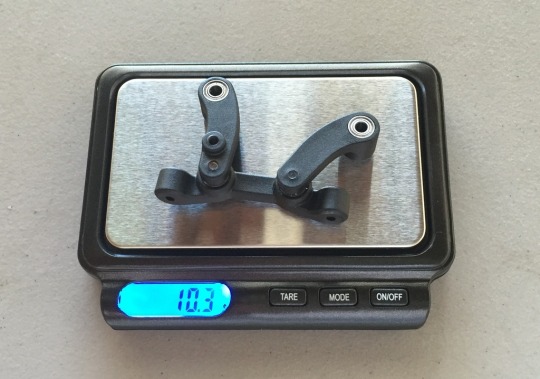
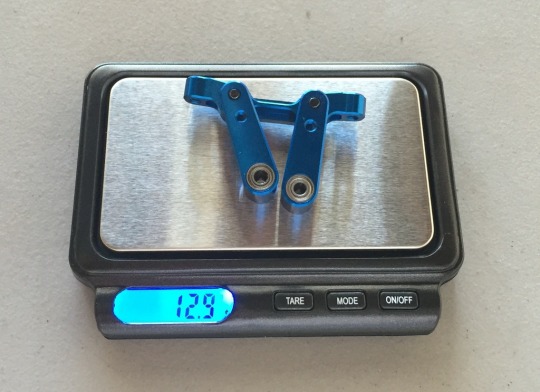
The weight difference between the two full steering systems is 2.6 grams.

I left the plastic servo horn in my buggy, but it broke within a few packs.  I replaced it with another plastic horn, and that broke on the next pack.  So I decided to get an aluminum horn.  Associated makes two horns, one for the B5 and one for the B6.  The B6 horn is a couple of mm more forward than the B5, but you should select the one that fits your servo better.  In my case, I have a Savox 1257-TG, and it would probably fit better with a B5 horn – the B6 horn mounts it a little too far forward.  It’s not a big deal, but it’s less linear this way and the steering linkage is not quite perpendicular to the steering rack like it should be.

Overall, I find the aluminum rack to be more precise and direct.  There might be a touch more steering with the added weight as well.

Something I noticed was that my steering linkage was hitting the left upper brace when steering is turned to full right:

image


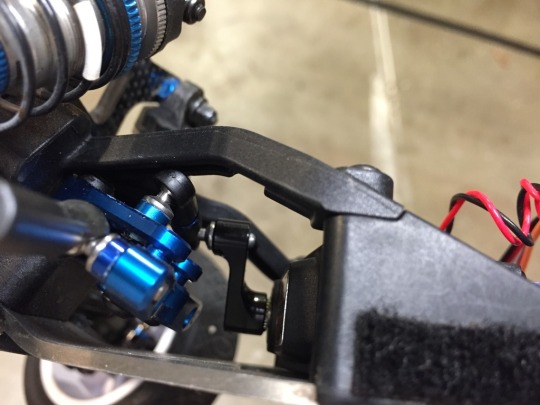
I had to take my dremel and notch a little clearance for it.  I’m not sure if this problem existed with the plastic rack, but without the clearance I could only get 95% throw left and right.  With the notch, I can get 105%+ steering EPA.

image

Overall a nice bit of kit.  The buggy feels more precise with maybe a touch more steering.  As long as I don’t start blowing out servo gears, I’ll be keeping it in.

Tuesday, October 11, 2016

Top 10 TLR 22 character pros

I recently wrote up a top 10 list of the things I find a bit annoying about the 22 platform, so I thought I’d put up a list of the top 10 things I think the 22 platform excels at.

  1. Shocks: the shocks on the TLR 22 series are flat out amazing.  You have aluminum shock bodies and caps, 3.5mm shock shafts, durable and smooth X-rings, and the pistons are machined.  They are some of the highest quality shocks on the market today.
  2. Mid and rear motor: the 1.0 and 2.0 kits allowed for mid or rear motor, which was one of the first platforms on the market for both setups.  This allows your vehicle to work in anything from high grip clay to super loose outdoor tracks.
  3. Option parts:  TLR is constantly testing and refining their platform and coming out with option parts all the time.  When they find something that works (front mounted shocks, 3-gear transmission, dirt laydown, etc.), they will quickly release it to the public and make it available.  You don’t have to wait for the next X.0 release, these changes come out incrementally throughout the year.
  4. Diff:  the 22 diff has ground diff rings, second stage machining on the outdrives, and tungsten-carbide diff and thrust balls.  They are extremely smooth.
  5. Support:  the TLR team is quite active online and on social media to answer questions, provide support and tips.  I think they have the most direct interaction with the customer of any company out there.
  6. Durability:  while the plastic parts don’t wear especially well, they are quite durable platforms.  My son drives my T 2.0 and often plays “tag” with his friends’ cars, and it holds up extremely well.
  7. Parts compatibility:  many of the parts are interchangeable between the buggy, truck, and short course which allows for experimentation on shocks, arms, wheel offsets, etc.
  8. Out-of-the-box setup:  the stock setup is usually fantastic and pretty close to perfect out of the box.  You usually only need to make minor changes for your particular track and driving style.
  9. Lexan:  I’m not sure if the polycarbonate they use is different than other manufacturers, but I find the bodies and wings to be especially tough and durable.  In fact, I use the 22 wing on all of my non-TLR buggies too!  Throw in the fact that they’re usually pre-cut, and these kits use some of the nicest Lexan out there.
  10. Out-of-the-box thinking:  TLR often experiments with some unusual ideas, like race-level RTR’s, support kits, full screw replacement kits, etc.  A lot of these ideas don’t pan out, but it’s nice to see a company experiment not only with the vehicles, but also different ideas in the marketplace.

Tamiya Hornet tuning, continued

I made a couple of changes to the Hornet recently for the outdoor track I’ve been running at.

I swapped back to the original free-floating rear drivetrain (instead of the Grasshopper fixed pivot), because at this track it’s rather bumpy and I wasn’t getting enough suspension action.  The Hornet rear suspension definitely is more erratic, but it is absorbing slight imperfections in the dirt surface while the Grasshopper suspension is better for straight-line performance.

I think if you’re doing drag racing, the Grasshopper rear end is probably better, and if you have a mild bumpy surface, the Hornet works better.  But on big bumps, the Hornet really jumps around a lot and is pretty hard to control.  I’m not sure there is anything you can do for this.

The second change I made was to use Tamiya anti-wear grease in the diff to slow down the diff action and give it a limited slip effect.  This was a tip I picked up on the tamiyaclub forums, and it does work.  The anti-wear grease is quite thick and sticky, so it slows down the open diff the Hornet re-release has and works a little better is the loose stuff.  Hopefully it stays in place!

Thursday, October 6, 2016

Slash 4x4 tuning for the outdoor track


I’ve been running my Slash at the outdoor park track and it’s been fun.  Ran into the guy who built it and learned a bit about its history and such.  Really nice guy.

Did some testing, and my indoor clay setup definitely does not work.  Dropped spring rate to SCTE blue front and SCTE green rear, and it’s close, probably still a little oversprung.  Over-damped as well, gonna dropto 27.5w 1.5 piston front and 25w 1.5 piston rear.  Also need to add a few more mm of ride height.

Pro-line Calibers work well in really loose stuff, like a BMX park or a baseball diamond, but this is too hard-packed and clean.  Going to try AKA Wishbones, which is the next step down in pins, but I really should get a set of dedicated hard-packed tires, like Proline Holeshots.

It’s been fun converting my Slash into an outdoor track basher.

Tuesday, October 4, 2016

Didn’t stick the landing that well, but here’s a little whip action at the local track with the B6.

Monday, October 3, 2016


I’ve been converting my Slash 4x4 into a basher truck for the local outdoor track at the park.  One thing I noticed was that the truck was making a clicking noise at full right, which I thought was the body hitting the tires.  I narrowed down the noise to the wheels.
These are Pro-line Calibers pre-mounted on Renegade wheels.  The inner ribs stick out too far and hit the steering blocks, so you have to trim them down with some curved body scissors.
Original wheel on the left, cut down ribs on the right.
Problem solved!

Wednesday, September 28, 2016

Entry-level RC radio comparison review: Sanwa MX-V vs. Flysky FS-GT3Cvs. Futaba 3PV/T3PV


image

Here it is!  We are proud to bring to you the ultimate radio comparison of 3 of the top 4 entry-level transmitters on the market today

We were able to pull together:
  • Sanwa MX-V
  • Flysky FS-GT3C
  • Futaba 3PV/T3PV
We also contacted Horizon Hobby to see if they were interested in providing a Spektrum DX4C, but unfortunately they didn’t get back to us.  It would have been nice to include that in the comparison, but no matter, the show must go on!


Overview:

This comparison focuses on the entry-level class, which is a step above your regular RTR radios.  What you get in this category is LiPo battery compatibility, drop down wheels, LCD display with menus, all the steering and throttle adjustments (EPA, dual-rate, expo, trim, servo reversing), model memory, foam wheels, and ABS.  Some of the radios have additional functions.

For the test, we ran all 3 transmitters in the same vehicle, a track-prepped Traxxas Slash 4x4 Platinum edition, on an indoor clay track back-to-back-to-back.  The Slash 4x4 is not the most precise vehicle, but my co-tester Alex drives one as his usual track car, and is very in tune with how the truck handles.  We think it represents a vehicle both bashers and entry-level racers use and fits the archetype of the target market. 

I’ll rank the radios in several different categories based on which I think is the best/second/third in that category and my thoughts on each.

Features:
  1. Futaba 3PV
  2. Flysky GT3C, Sanwa MX-V (tie)

All 3 of these radios are very similar in feature.  They have the different adjustments listed above, but the Futaba stands out with some bonus features.  The big one is obviously receiver/battery voltage telemetry (with compatible receivers and sensors), but it also has 4-wheel steering/mixing using a 4th channel. 
The FS-GT3C and MX-V are essentially identical in terms of features.  There’s nothing special about them, but more importantly, there’s nothing they’re missing.  You’re going to be able to do everything you need to do with these radios.

Design:
  1. Futaba 3PV
  2. Flysky GT3C
  3. Sanwa MX-V
The MX-V is starting to look a bit dated, with its small screen, chunky body, and dark gray body.  The FS-GT3C has a sleek, and very flat body with a large display.  It has a folding antenna, which is rather antiquated compared to the integrated antennae of the other two, but it doesn’t look out of place and seems reasonably stout.  But the real winner here is the 3PV – it’s a miniature version of the high-end Futaba 4PX with clean, crisp lines, and an elegant, svelte body.  While simple and unassuming, it quietly wins the design category.

Controls:
I’ve decided to break this category down into 3 areas, because each radio has strengths and weaknesses in different areas.  If I had to pick one radio as the frontrunner, it would probably be the MX-V, not because I feel it has particularly good controls, but because it’s not particularly bad in any one area (except for the stiff wheel!).

Steering Wheel
  1. Futaba 3PV
  2. Sanwa MX-V
  3. Flysky GT3C
The 3PV has a very nice, high density foam wheel with a light (but not too light) spring that is very linear.  The MX-V has a ridiculously stiff (and it gets progressively stiffer!) steering wheel, but it has zero slop in it and is very precise. 
The GT3C has a sloppy wheel, there is no way around it.  It also has a non-linear turn, basically feeling like it has a bunch of expo dialed in (maybe 15-20%).  This took some getting used to, and I felt more comfortable turning down the expo to match the linearity of the other radios.  The wheel spring in our example also broke after a couple of months and had to be jury-rigged, so that’s not a good sign.  We were able to repair it, but with a lighter spring feel.
Overall, the 3PV wheel is pretty much perfect, while the MX-V is too stiff and the GT3C is too sloppy.

Trigger
  1. Sanwa MX-V
  2. Flysky GT3C
  3. Futaba 3PV
The MX-V trigger has a short throw and is a bit too firm, but it is precise and more importantly has a fairly short brake throw.  This is important to me because I have short fingers, and I could never get comfortable with the long throw of the 3PV.  The Futaba is bad enough that I have to partially shift my hand position to get full extension on the brake.
The GT3C actually has a non-linear trigger – the first 70% of travel does not equate 1:1 with 70% of throttle, it has a flat curve and then quickly arcs upward in the last 30% of travel.  With about 38% of expo, we were able to (mostly) fix it, but it’s something that you should be aware of.  But the trigger is pretty smooth without much play, and the brake is a comfortable distance.

Layout
  1. Flysky GT3C
  2. Sanwa MX-V
  3. Futaba 3PV
The GT3C has a fairly vertical handle which I like.  It also includes two rubber grips to adjust the size of the handle for different hands.  And, a little unusual in this class, it has a full drop-down wheel that makes the hand positions very comfortable.  The wheel sticks out a bit further from the controller than the other two.  It’s also the only controller of the group with a thumb switch for controlling channel 3 on/off and trim.  This is one area where the Flysky is head-and-shoulders above the others.
The 3PV has a very smooth, but badly angled grip so that your hand falls away from the radio.  Coupled with an upward sweep of the trigger, and you will want to have long fingers to properly use this radio.  See my 3PV review for more details and pictures on this issue.  It also has a partial drop-down wheel.
The MX-V is middle of the road.  The grip feels fairly ergonomic and has a textured plastic design, but it’s nothing particularly remarkable.  It also features a partial drop-down similar to the 3PV.

Construction:
  1. Sanwa MX-V
  2. Futaba 3PV
  3. Flysky GT3C
The MX-V is the tank of the group.  It’s bulky and the heaviest, but that heft and size makes it feel more durable than the other two.  I felt the GT3C was OK, but the build quality seems fairy questionable.  Fit and finish is a little behind the other two.  The 3PV is very light and feels small, but does not feel flimsy

For bashing, I would pick the MX-V for its durability (no, we did not drop test them, this is just a guess).  It’s a solid feeling radio.

In terms of weight, the GT3C is the featherweight of the group, coming in at 324g with battery.  The 3PV is slightly heavier at 344g, and the MX-V is the heavyweight of the group at 401g fully loaded.  Overall, this is a pretty light group of radios.

Performance:
  1. Futaba 3PV
  2. Sanwa MX-V
  3. Flysky GT3C
Performance is subjective, what I’m referring to here is how responsive and accurate the radio feels in controlling the car.

The 3PV feels the most responsive to me, with seemingly lower latency and a more in-tune feeling.  I ran it back to back with my MT-4S on my buggy and it felt very close.

The MX-V feels vague to me and I’m pretty sure it’s a little bit slower in response time.  The very stiff trigger and wheel also made it feel like you were always trying to put in a lot of action on the controls and it was a step down in terms of being “one with the car”.

The GT3C is not bad, but the sloppiness of the wheel and the not-quite linear feeling I got from the throttle/steering made it always feel like you were never 100% sure what was going to happen.
Now there is definitely some oddities with the GT3C on the electronics response front.  On the throttle, in the air, there’s almost a slight delay or maybe slow throttle lift-off when you release the trigger.  Those of you who own Slash 4x4′s know of its tendency to nose-down in jumps.  Well, with the MX-V and 3PV, this nose-down issue was there, but it completely disappeared with the GT3C!
 
It’s really strange – what I think is happening is that the GT3C will smoothly drop throttle down to 0 when you let go of the throttle, while the MX-V and 3PV will chop it straight to 0.  Kind of weird, and not what you would normally look for in a radio, but it worked remarkably well in smoothing out the attitude of the car.  So what this tells me is that the FlySky engineers designed in some non-standard traits into the radio:  there’s +expo on the steering to make it turn in more sharply and more quickly, and -expo on the throttle to make it slower/easier to control in the first half of the pull before it ramps up to full throttle.  And then there is some throttle smoothing going on so that the car is not so abrupt when transitioning from throttle to neutral to brake.  I did not like the +/- expo pre-dialed into the steering/throttle, but the throttle smoothing curves definitely made the Slash 4x4 much easier to jump and land.

Display:
  1. Flysky GT3C
  2. Futaba 3PV, Sanwa MX-V (tie)
The MX-V display is a little on the small side, but it works and is fairly easy to read.  The 3PV has a larger, squarish display with a very nice glossy finish, but the numbers and menu items are small.

The winner is the GT3C which has a very large display nearly the entire length and width of the top of the radio.  The display is huge, the numbers are huge – it’s very easy to read even if you have bad eyes in low light.  It’s also the only display of the group that is backlit.  A nice feature, especially if you race indoors.

Menu:
  1. Sanwa MX-V
  2. Futaba 3PV
  3. Flysky GT3C
Let’s get this out of the way – the GT3C menu sucks.  It’s terrible.  It makes no sense at all, and there are too many buttons.  Scrolling right made the menu go left.  There was also something weird going on with the memory of the various trims and EPAs, sometimes they seemed to transfer over to other models or get preset by accident and I still am not sure what was going on.  We were also unable to get the GT3C properly calibrated with the ESC on the Slash.  Throttle EPA and expo were set to default, forward or reverse didn’t help, it never was properly set up, so the Slash ESC did not like the signals it was getting.

The MX-V menu is straightforward and has 17 menu items to scroll through while the 3PV has a whopping 27, which is far too many.

The 3PV button layout is simpler and more intuitive to go through the menu, but the sheer number of things you have to scroll through drop it to second place.

While there nothing magical about the MX-V, the menu system is simple and just works like it should.

Binding:
  1. Futaba 3PV
  2. Sanwa MX-V
  3. Flysky GT3C
Binding the 3PV is a cinch – you just turn it on and press the bind button.  Binding the MX-V is more involved, you have to turn on the car with the bind button held down and then turn on the radio with the bind button held down.  I did not bind the GT3C, but it uses a bind jumper plug, so it falls to last place.

Battery:
  1. Flysky GT3C
  2. Futaba 3PV
  3. Sanwa MX-V
The GT3C comes with a single cell 800mah LiPo that you charge with the included mini-USB cable.  Very nice!  It has no other choices for batteries, you can’t use AA or other battery types in the very small battery compartment, but I’m sure you could find replacement LiPos if necessary.

The 3PV comes with a socket for the standard Futaba (but of course) JST connector and a battery tray for 4 AA batteries.  We used a LiFe battery for this test which worked well, although some stick LiFe/LiPo batteries are a little tight.  It also has a charging plug if you want to use a Futaba NiMh battery.

The MX-V is hardwired for a 4AA battery tray, but I was able to modify it to use a JST connector with minimal effort.  With the modification, you can use the battery of your choice.

Manual:
  1. Futaba 3PV
  2. Sanwa MX-V
  3. Flysky GT3C
The 3PV manual is well laid out and printed on nice, glossy paper and is an excellent example of what a radio manual should look like.

The MX-V manual is fine too, printed on plain black and white.  It’s maybe a tad more confusing to read, but it’s still very good and I have no complaints.

The GT3C manual is just flat out terrible.  It’s bilingual in English and Chinese.  Maybe if you read Chinese it’s an awesome manual, but the English part is really bad and clearly written by someone who is not a native English speaker.

Price:
  1. Flysky GT3C
  2. Sanwa MX-V
  3. Futaba 3PV
The GT3C is the big winner here, and it has a huge advantage over the other two.  Street price is $50, which is lower than most RTR radios!  It’s about half the price of the MX-V ($99) and 3PV ($109).

If you are on a budget, the GT3C will save you quite a few dollars.

Receivers:
  1. Flysky GT3C
  2. Futaba 3PV
  3. Sanwa MX-V
The GT3C also has fairly small, light receivers for an astoundingly low price of about $6 on the street.  That’s just ridiculously cheap.

The Futaba receivers (you need FHSS/S-FHSS/T-FHSS ones) aren’t too bad – fairly typical for the industry.  You can get a very nice R204GF-E antenna-less receiver for about $35.

Sanwa receivers are just plain expensive and by far the most of all radio manufacturers.  The cheapest receiver (you need FHSS-2 compatible) starts at about $60 and it just escalates quickly from there.  If you’re considering using this radio with more than one car, check into receiver prices before you make your decision.  They can really add up!

Conclusion:

The Flysky FS-GT3C is basically a cheap-ish Chinese version of what the Japanese companies offer, and it feels like one.  That’s not to say it doesn’t get the job done – it does, and if you are price-conscious, it is half the price of the other radios.  It has some weird driving characteristics and questionable build quality, but it has all the right features that you need and the included battery is a nice bonus.  It also turned our Slash 4x4 into an amazing jumping machine.

Of the two Japanese radios, I think the Futaba 3PV is probably a bit of a better radio as long as (and this is a big if!) you have longer fingers and can deal with the ergonomic issues.  The steering wheel is definitely better, but the throttle trigger is too long and slopes at an upward angle.  Try one before you buy.

That’s not to say the Sanwa MX-V is a bad radio – it isn’t.  It’s starting to feel a little dated next to the other two, but it’s a solid radio and probably the most durable of the group.  It’s definitely a quality transmitter and you won’t be disappointed if you buy one.  You can race with it, you can bash with it – it does everything competently.  If it dropped a few grams and got rid of the heavy controller springs, it could easily win this comparison.

Overall, we have to choose the Futaba 3PV as the winner.  It’s priced slightly higher than the others, but the feature list, the performance, its light weight, and the fact it won most of the categories puts it at the top of the list.

Winner:  Futaba 3PV

We hope you enjoyed this blog post and that it helped you in deciding on your next RC radio!

Monday, September 26, 2016

Slash 4x4 rear assembly attachment

This is not a particularly exciting post, but a little tip that might save you a few minutes of frustration is how I reattach the rear assembly on my Slash 4x4.

The Slash has a modular design so you can yank the whole front end off or the whole rear end off.  Putting the rear back on can be a little tricky because you have to align the slipper clutch shaft with the gear in the rear bulkhead, but the gear spins freely and won’t stay in place.

An easy way to make sure they’re lined up is to set the slipper shaft at horizontal.  It should stay in place by itself due to the magnets in the motor preventing the spur gear from turning.

Then set the rear assembly on the ground (or your table) on both wheels and the rear bumper.  This will form a stable tripod and will prevent the diff from turning.  Holding it with your right hand keeps it in position so you can slide the chassis on with your left hand.

It should go on easily without a lot of force since everything is lined up!

Thursday, September 22, 2016

Futaba 3PV / T3PV review


image

My Futaba 3PV came in!  Tower was having a good deal on this radio, so I picked one up and decided to do an update on the Futaba 3PL vs. Sanwa MX-V comparison.  That’ll come later, but first up is the review of the Futaba 3PV!
Scores in the following categories are rated from 1-10, with 5 being what I consider average in the class, and 10 being perfect.

Overview:
The 3PV is the new replacement for the venerable 3PL.  The 3PL was getting a little long in the tooth, and had run its course.  It had a few shortcomings, namely the menu system sucked and there was no expo control.  It also looked (and felt!) like you were holding Thor’s hammer…
The 3PV looks to rectify those shortcomings – at first glance, it’s a pretty stylish controller, has all of the right features, and is priced similarly to the 3PL at $109.99.
Now, this radio is sometimes referred to as the 3PV and sometimes it’s called the T3PV.  They’re the same radio, and it’s a little weird because the print on the radio says T3PV and the manual says 3PV.  If you look online at Futaba’s website and other places, it’s referred to by both names.  I’m not sure if they changed their mind on the name halfway through or what, but I’ll be calling it the 3PV in this review.

Features: 8
The radio has all the main adjustments you would expect from a good entry-level transmitter:  trim and sub-trim, steering and throttle EPA, dual-rate, and… (an upgrade from the 3PL) expo!  That was really my only gripe with the 3PL, you couldn’t adjust steering or throttle expo.  It also has an LCD display, internal antenna, 4 channels with 4WD/mixing and ABS.  Pretty much like the 3PL, but the LCD is much larger and centrally placed.  The radio supports 4 channels, but the 3rd channel is switched only, and the 4th channel can only be used in 4WS mode in conjunction with the steering channel.
This feature set is pretty standard for this category of radios, but it does have something unusual:  telemetry.
Well, not full telemetry – what the 3PV supports is receiver voltage (if you pay extra for the R304SB receiver version) and battery voltage (if you buy the $50 external sensor).  Receiver voltage isn’t that useful for electric vehicles, but could be useful for nitro. 
I use battery voltage on my Sanwa MT-S and MT-4S and find it incredibly helpful.  At $50 for the sensor and $50 per receiver, it’s a bit pricey to do the same with this system.  So it’s not quite the full telemetry you get with the high-end systems, and it’s a little pricey to even get battery voltage.  I expect most owners aren’t going to use voltage telemetry, but it’s there and certainly an added bonus.

Design: 8
What’s not readily apparent in the pictures is that this radio is tiny.  It’s elegant.  I’d call it petite, even.  It actually feels more like a 7/8th scale radio to every other radio in it’s class.  If I still had my 3PL, putting it side-by-side would be hilarious, as it is so much smaller.
I personally found it disconcertingly small at first, as I’ve never used a radio this small before, and I honestly felt a little uncomfortable walking around with such a small radio.  If you have size-compensation issues, this is not going to be the right radio for you…
But over time, I got used to it and started to like the small size, and…
…it’s also insanely light!  I weighed it at 262 grams (without the AA battery tray).  It’s gotta be the lightest radio in it’s class, by far, and is probably lighter than a lot of RTR radios.
The design is quite elegant, it has kind of a 4PX profile, but on a smaller scale.  It has a nice, fairly large easy-to-read LCD display.


image

At the top is a row of menu items that you can scroll through using the left and right arrow buttons.  The +/- buttons adjust the item you’re on.

Controls: 4
The handle is quite angled, compared to the Sanwas which uses a more upright handle.  It’s also quite thin, and fits small hands well.  The wheel is nice with a fairly light amount of tension, and has a very linear rate.  It measures at 51mm across, which is the perfect size to me and not humongous like the Spektrums.
One nice detail on the wheel is that the foam sits in a grooved channel unlike the 3PL.  This prevents the foam from sliding around left and right, which can be a problem on most radios.  I ended up gluing the foam down on the 3PL, but this nice design improvement will avoid that necessity.  Well done Futaba!
The trigger had a tiny bit of play, but the thing I noticed immediately (and did not like) is that there is an upward angle between the handle and the trigger.  In other words, the trigger sits a little higher than your hand, which means your finger has to sweep upward a little bit to reach the trigger.
This was kind of weird, and coupled with an angled handle meant that my trigger finger had to extend extra far and upward to brake.  Here you can see the upward sweep from grip to trigger in red, as compared to the MX-V in blue.  You can also see the more swept back grip.
If you’re familiar with fireams, the 3PV has more of an M-16 style grip, whereas the MX-V has more of a .45 Colt grip.


image

It doesn’t look like much, but trust me, you can feel it when using this radio.  I have short fingers, so this actually made it difficult to use the full length of the brake.  With long fingers, this is probably not as much of an issue.
Another thing is the trigger also goes all the way up flush with the underside of the transmitter at full brake, which means your finger tends to hit the underside of the transmitter.  I found this annoying and intrusive.


image

Trigger hole size is average sized:  I measured it at 17.1mm in diameter, which was a little big for my finger, but nothing untoward.  Trigger pull was measured at 14mm for throttle, and 6mm for brake, for a standard 70:30 ratio.  But the brake feels longer than that, as explained above.
Overall, the radio has a nice wheel, but the handle and trigger are not quite ergonomically correct in my opinion.  I have to give it lower marks for this reason.
Construction: 7
The plastics on the 3PV are nice and smooth, construction is solid, and there are no abnormal gaps are seams.  The plastics seem a little thinner and lighter than what I remember on the 3PL – that transmitter was a beast of a radio, and I dropped it many times and it took it like a champ.
The 3PV is probably not as robust as the 3PL.  The 3PL was a tank, and weighed like one too.
There is about a mm of play laterally on the trigger.  I didn’t notice it when driving, but it’s there.

Performance: 7
The radio feels pretty responsive to me, I did not notice any abnormal delays or lag.  I ran it in S-FHSS mode, which might be faster than standard FHSS, I’m not really sure, but it felt natural and quick.  I’m sure it’s not as quick as some of the high-end models, but for club racing I don’t think you’ll have any issues.  I’ll have to set it up in my 2WD stock buggy to get a better feel, but so far it seems fine.

Menu:  4
The menu system is fine – it shows you which adjustment you’re on, and you can cycle through them left and right.  But there’s one annoying thing about the system, there are 27 friggin’ items you have to cycle through to get back to the first one in the list!  I mean, that’s kind of crazy – fortunately you can go forward or backward in the list (the 3PL could only go forward), and you can go back to the battery main display by holding down a left/right button.  But that’s just too many selections for one menu, and it would’ve been nice if they had sub-menus or some other way to drill down rather have to cycle through all 27 of them.  For sheer annoyance factor alone, I have to give it a below-average score.

Binding: 7
Binding is super simple and couldn’t be easier.  You just turn everything on and press the bind button.  That’s it!  It supports 10 model memory, and model copy, which is a useful feature.
But something I noticed with Futaba radios that is different than some others, is that the receiver binds to the radio, but there is no model matching.  In other words, you could have a profile for your buggy, and one for your truck, but the receiver in your buggy is just going to bind to your radio.  If you switch your radio to the truck settings, it will still work with the buggy and it won’t know you’re driving in the wrong profile.  So you can accidentally be driving around in the wrong profile and not know it.
This is different than some other systems, where you HAVE to be in the truck setting and have your truck on to control it.  If you’re in the buggy profile, and turn your truck on, you can’t drive it until you switch to the buggy profile.

Battery: 8
The 3PV comes with a battery tray for 4 AA batteries, but you can remove that and plug in a LiPo or LiFe battery.  You can also buy a Futaba NiMh battery and use the integrated DC jack to charge the NiMh directly through the radio.  Lots of battery options!
I ran it with a LiFe stick battery which was a tight fit, you’ll want to get a more square battery if you go that route.
The 3PV shows you the battery voltage in nice big numbers on the display, so you’ll always know when it’s time to charge.  There is also an automatic power-off after 10 minutes of inactivity.  Handy little feature so you don’t accidentally drain your battery.

Manual:  9
The 3PV manual is complete and comprehensive and comes with a nice glossy cover and is printed on quality paper.  I didn’t find any errors, and it’s reasonably easy to read and refer to.  Yes, I did actually read the manual cover to cover!  (OK, I admit I skipped the warnings section).

Price: 5
The Futaba retails for $109.99 at the time of this post.  With coupons and discounts, I was able to get it for $96 - $10 rebate shipped, which is not overly expensive.  It’s not as cheap as the Chinese radios, but you kind of get what you pay for with those.  I’d say price-wise, this radio is middle-of-the-road.

Conclusion:  8
The Futaba 3PV is a good, much improved radio over its predecessor, the 3PL.  In this price range and class, it is one of the top radios on the market today.
Areas where it scores high marks are its elegant design, amazing light weight, big display, full set of features (including battery telemetry), and excellent battery options.  Performance seemed good, but its hard to tell without running it back to back with another radio.  Speaking of which…  I should have a comparison test with the Sanwa MX-V, and Flysky GT-3C in about a week.
I do have issues with the grip/trigger layout, enough that I recommend you test one out in person before buying if you can.  It’s honestly annoying enough that I may decide not to keep this radio, we’ll have to see how it stacks up against the other entry-level radios.  Stay tuned for an upcoming comparison review!

YouTube review:

Wednesday, September 21, 2016

Classes of RC radios/transmitters

I would categorize the transmitters out there into 4 different classes.  As you move up in price, you’re getting more features and adjustments.  Hopefully this post gives you an idea of what you’re paying for when you spend a little more for a radio.


RTR:  $40-60

RTR radios are, as the name implies, radios that come with ready-to-run vehicles. These are your basic, no-frills radios that are enough to get the job done, but are pretty limited in features and quality.  You can usually buy them standalone also.  They are the bare minimum to drive your car and adjust it.  You’ll get steering/throttle trim, dual-rate, servo reversing, and that’s usually it. 

If you’re lucky, you’ll get left/right EPA and maybe a 3rd channel control.  They generally feature 2 analog knobs to adjust steering and throttle trim, and a couple of switches for power and reversing.  Nowadays, they should all be 2.4 Ghz radios.


Examples: Traxxas TQi, Futaba 3PRKA, Spektrum DX2E, Tactic TTX300, Flysky FS-G2


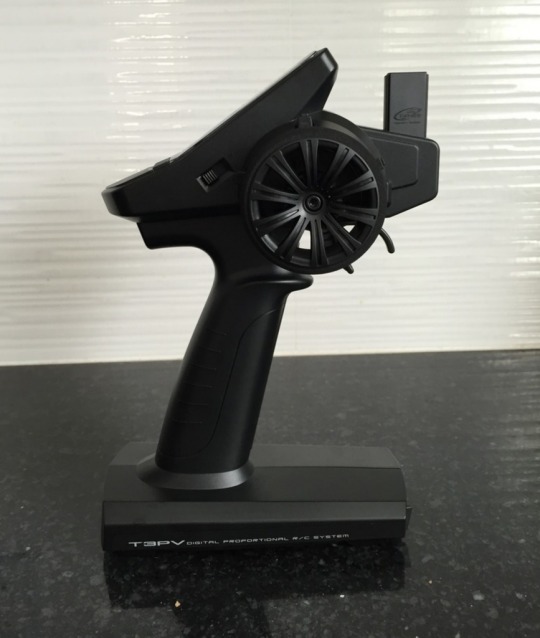
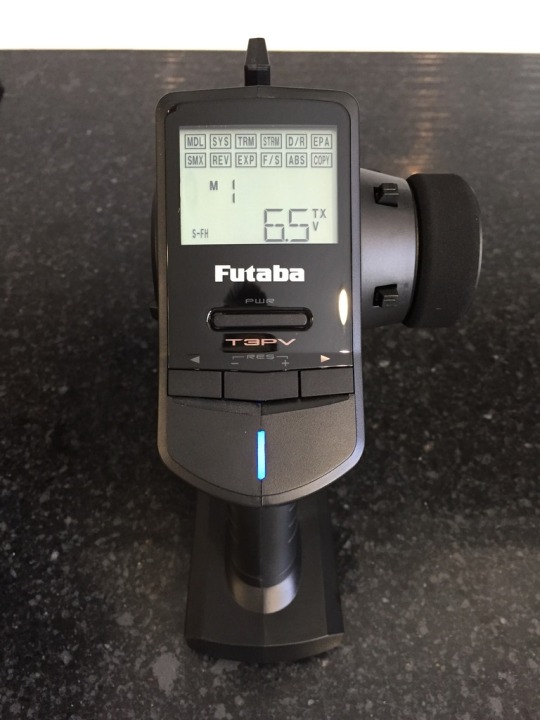
Entry-level:  $100-$130

When you’re ready to upgrade your RTR radio, you’ll want to look at the next tier of transmitters.  The entry-level radios will have digital adjustments, internal antenna, radio battery voltage, multi-model memory, steering/throttle EPA, 3rd channel, LCD display and menu system, steering/throttle exponential, and sometimes a connector for a NiMh/LiPo/LiFe battery.  They also usually have some more advanced features like ABS, 4-wheel steering/mixing and possibly stability control (Spektrum AVC).  For me, these radios have pretty much the most basic set of features you’ll want and what I consider the bare minimum for a radio. 

Examples: Futaba 3PV, Sanwa MX-V, Flysky GT-3C, and Spektrum DX4C.


Mid-level:  $230-$300

Mid-level radios will have more advanced features, including telemetry, faster response times, model memory/copy/clear, back-lit display, a multi-level menu system, and definitely a battery plug for nimh/lipo/life batteries.  You’ll also get programmable buttons/knobs, adjustable expo curves, battery alarm, and timer.  These radios also usually use a faster/newer protocol (i.e. FAAST or FHSS-3/FHSS-4) and often have proprietary servos and ESCs you can use for faster controls.

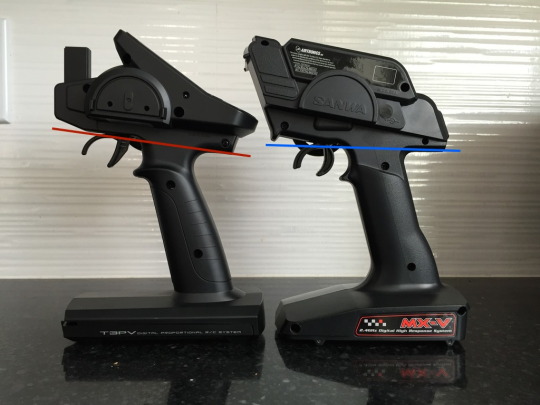
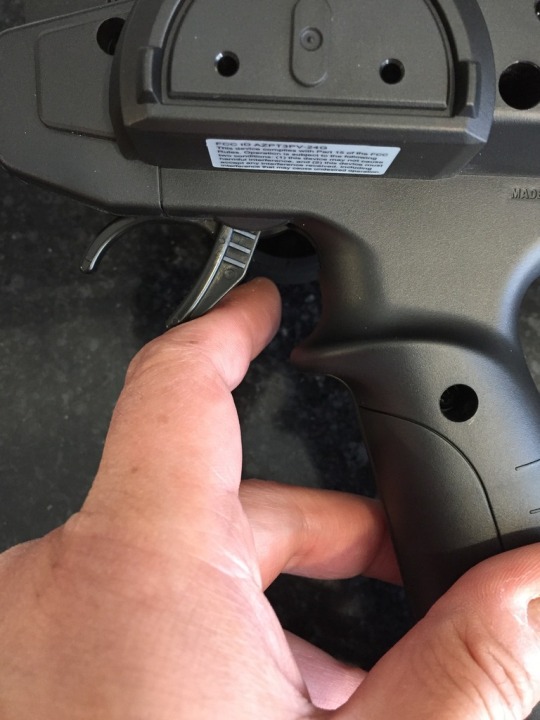
On the ergonomics front, you get adjustable trigger positions and tensions, usually a drop-down wheel and different size grips.  They are definitely made to adjust to fit your particular hand for comfort.

Examples:  Futaba 4PLS, Sanwa MT-4S, Spektrum DX-4R


High-end:  $400+

I don’t own any high-end radios.  The radios I’m talking about are the Futaba 4PX, Sanwa MT-12S, and the recently released Spektrum DX-6C.  At this level, you get color displays, headphone jacks, and in the case of the DX-6C some seriously advanced features:  it runs Android, so you basically get a smartphone/transmitter combo in one and can run your browser, YouTube, or whatever app!  I expect this segment to go bonkers now that Spektrum has jumped the shark with regards to technology!

Monday, September 19, 2016

Hornet at the park

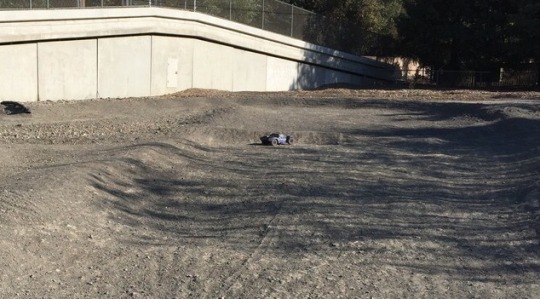
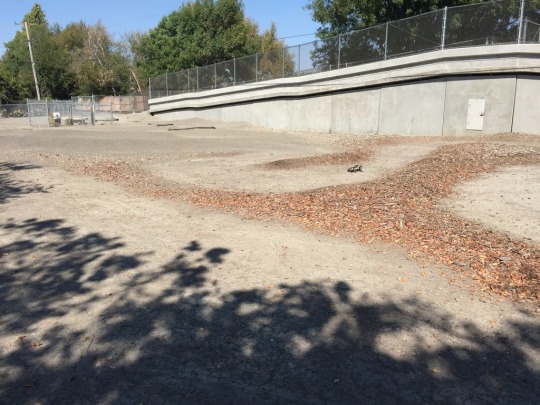
I was searching around on Google, and found out that a local city park had an “RC track” right by my work.  So of course I had to go check it out.  I mean an RC track at the park?!?

image

I brought the Hornet out and messed around for a battery.  It was a bit bumpy and needed a sweep, but made for a nice, relaxing lunch hour break.

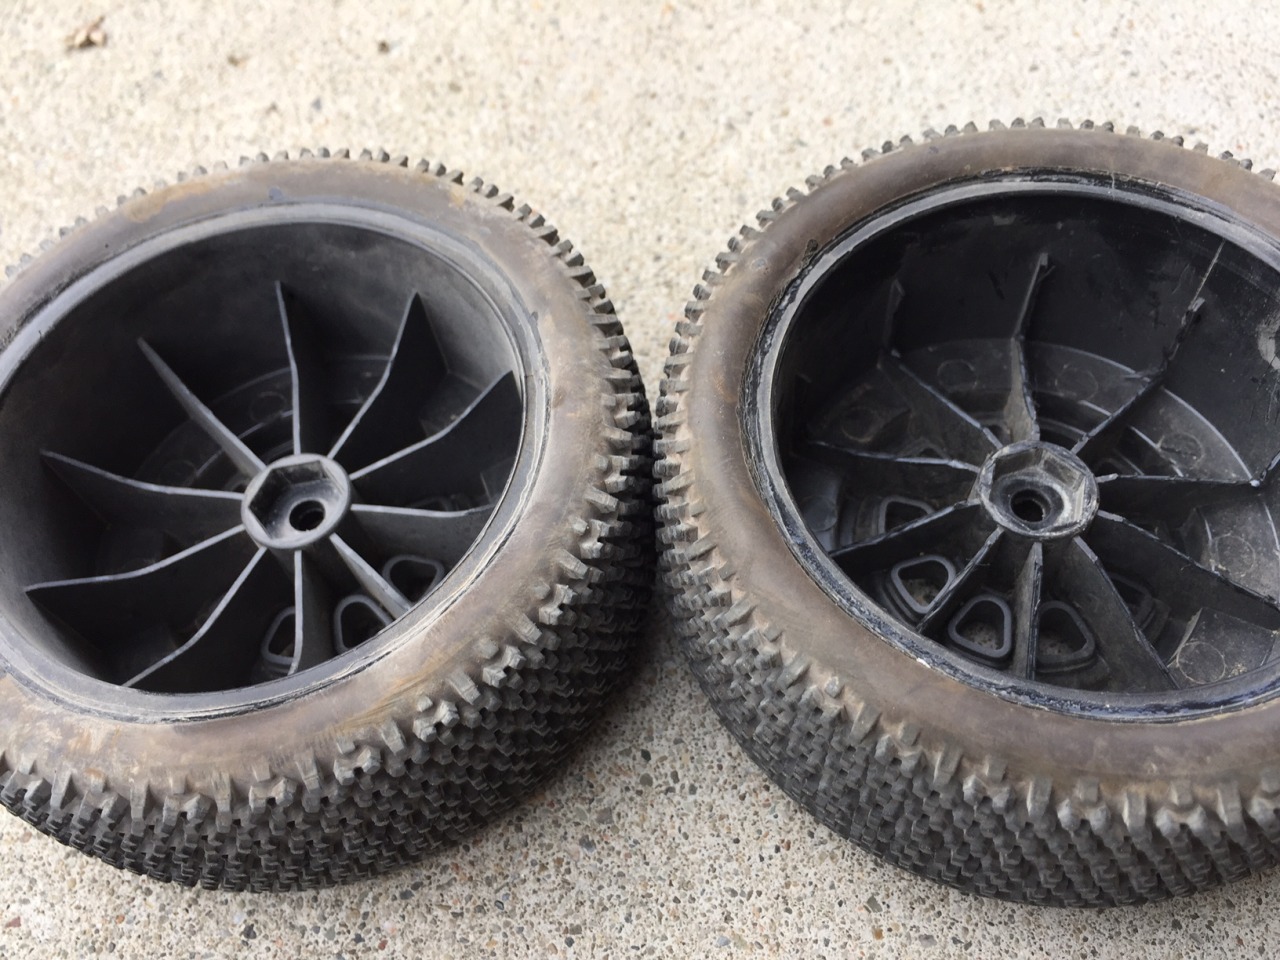
Some more stuff I noticed about the Hornet – because the drivetrain is so heavy, the tires are basically the only form of suspension on the buggy, the shocks effectively don’t do anything.  So the softer the tire, the better, and you don’t want to run any foams.

I also realized the diff is completely open and has no limited slip effect at all.  It’s fine on asphalt/tarmac, but on dirt it’s pretty terrible.  I’m going to look into correcting that.

The track is split into two parts, a smooth section and a bumpy section with some small jumps.

image

I’ll definitely be back.

Sunday, September 18, 2016

Futaba 3PV/T3PV review on the way

Tower Hobbies was having a rebate promotion on Futaba radios, so I picked up a Futaba 3PV for $96 - $10 rebate, so basically it ended up being $86 shipped.  The radio should be here in a few days, so look for a review in a week or two.
I’m looking forward to seeing how this radio stacks up with my Sanwa MX-V and finding out which is the top dog $100 radio.  Stay tuned!

October 19, 2016 update:  The full comparison is here:
http://razorrcblog.blogspot.com/2016/09/entry-level-rc-radio-comparison-review.html

Thursday, September 15, 2016

Top 10 TLR 22 character flaws

I’m a big fan of my 22T 2.0.  It’s a fantastic truck, and one of the most fun vehicles I’ve had the pleasure to drive.  I also had a 22SCT 2.0 that never was hooked up for me in mid-motor, but I’ve got probably 100+ packs through these cars, and so feel I have a pretty good handle on their positive and negative attributes.

While every series of RC cars has their flaws, the 22 has its own uniqueness.  You can call it “character” or whatever, but these are the things that I’m not particularly fond of with the 22 series.  They’re good cars, and if these things were fixed, I’d say they’re damn near flawless.  While none of them are dealbreakers, they are the little things that get to me.

  1. Weak slipper:  the slipper isn’t too bad with 17.5 or 13.5t motors, but on the SCT with its big tires, and heavy chassis and a mod motor, the stock slipper really isn’t up to the task.  I find the slipper spring weak, and the pads glaze pretty easily and don’t provide the bite you need for a short course truck.
  2. Ballcups:  the HD ballcups are actually super smooth and fit nicely to the ballstuds, but they are not drilled from the top, so to remove a ballstud you have to pop them every single time.  They also are not the most durable, so if you pop them off a lot, they tend to stretch out a bit and come loose in collisions.  And then you have to replace them.
  3. 2-piece topshaft:  the topshaft is aluminum with a thin threaded steel rod that can come unthreaded.  It also tends to bend if you tighten the slipper down super tight.  The topshaft also uses a 5mm nut instead of a standard 7mm nut.  I mean, why?
  4. Mostly metric:  the 22 series is almost completely metric, but not quite.  There is a 0.05″ screw holding the rear pivot block in place, and there’s a 4-40 screw/nut in the bellcranks.  If it’s metric, just make it metric!  Which brings us to our next dislike:
  5. Bellcranks:  the steering bellcranks are an afterthought on the 22.  The original 1.0 cars came with a sliding steering rack, which was quite frankly, stupid, and they later retrofit a bellcrank system that barely fits.  But the plastic bellcranks get super sloppy.  The steering posts are also threaded aluminum that you have to thread in screws from the top and bottom, which means you have to somehow get loctite in there and they tend to rotate while you’re trying to screw them from one side or the other.  There are also these tiny little shims you need to get in there which tend to get bent or lost.  Could be better.
  6. Painted springs:  the springs are color coded with little dabs of paint that wear off.  And then you have no idea what springs are on there.  I ended up using colored 1/16″ heat shrink tubing to identify them.
  7. Plastics:  the plastics are good…  for about 15 packs.  Then they develop slop.  Now, the Associated 5-series also got sloppy fast, but the new B6 has amazing plastics that don’t develop slop.  So while it was OK the last few years, the other manufacturers have upped their game and left TLR in this regard.
  8. ESC on the battery:  I mean, come on!  the 22 (1.0, 2.0) and 22T were designed for you to mount the ESC above the battery?!?
  9. Anti-squat shims:  the 22 uses a bunch of little plastic shims to set the anti-squat, and a tiny little screw (that’s easy to break or lose) to hold them in place.  It’s pretty primitive – inserts/pills or different blocks are much nicer.
  10. CVDs:  this is kind of a nitpick, but the 22 uses grub screws to hold in the axles on the CVDs.  They can back out and tear up your hubs…  ask me how I know.  Other manufacturers use a captured system.

Honorable mention:  the E-clips in the shocks.  This is kind of a wash, because I hate E-clips, but I have to admit they’ve never come off (like the nuts on the Associated shocks).  So what are you gonna do?

Don’t get me wrong, I consider myself a Losi fan and I always root for the underdog.  I just thought this would help out those who want to know what flaws the 22 cars and trucks have.

Monday, September 12, 2016

Team Associated RC10 B6 / B6D axle heights (caster bushings, hubinserts) explained

One of the most confusing tuning options on the B6 is the ability to adjust axle heights front and rear.

In the front, there are included aluminum caster block bushings to adjust the height of the steering block relative to the arm.  This is an area where the B6D differs from the B6 – the B6D comes with 0 and 3mm bushings and the B6 comes with 1 and 2mm bushings.

In the rear, there are also plastic inserts for the rear hub so that you can again raise or lower the hubs.  So what is this for?  What does raising or lowering the hubs do?  The rear of the manual has a brief explanation, but people seem to think that the purpose of the caster hat bushings is to add or reduce steering.  That’s not actually true.

The real reason to adjust the bushings is to adjust the axle height when you raise or lower the chassis ride height.  Every time you want to raise or lower the ride height, you should make the corresponding change to the axle heights so that you keep the overall geometry of the arms and camber links (and steering links, and bump steer, and yada yada yada) the same.  You don’t want to just change out the bushings without re-setting the ride height (or vice versa), because then you are also changing chassis angle, camber link angles, and arm angles simultaneously.

For example, this is my buggy at 23mm ride height and with the front caster bushings at the +1mm position:


image


The arms are nice and flat and the camber links are set to where I like them.

Now if I make a drastic change and lower the ride height to something super low, the camber links (and resulting roll center) are also going to change drastically.  Take a look at the angle of the camber links when the chassis is dropped a ton in the front:


image


They have a massive downward angle, and you’ve effectively changed your roll center a bunch.
So the main purpose of axle height adjustment is to keep your arms relatively the same when changing ride height.  Then everything else (ballstuds, camber links, etc.) will remain the same and not need readjustment or have additional effects.
Reiterating:

Front axle height
  •   0 position:  3mm bushing on top, 0mm bushing on bottom
  • +1 position:  2mm bushing on top, 1mm bushing on bottom
  • +2 position:  1mm bushing on top, 2mm bushing on bottom
  • +3 position:  0mm bushing on top, 3mm bushing on bottom
The 0 and 3mm bushings come in the B6D kit, and the 1 and 2mm bushings come in the B6 kit.  You can also get the whole set with Associated part# 91676.

Rear axle height
  •   0 position:  0/3 insert with tab on top
  • +1 position:  1/2 insert with tab on top
  • +2 position:  1/2 insert with tab on bottom
  • +3 position:  0/3 insert with tab on bottom
As a general rule of thumb, for 23mm ride height, you want to run the axles pretty low, at the 0 or 1 positions.  And then for every 1-2mm of ride height drop, you want to raise the axle heights by about 1mm.

Sunday, September 11, 2016

HUDY setup station tips

I was trying to get my B6 more dialed in, so I threw it on the HUDY setup station to set camber and toe a little more accurately.

The HUDY station is pretty tricky to use, because you want to measure with it pretty close to your resting ride height position, but when it’s in the hangers, it’s at a different height.  So to get the best out of your station, here’s a couple of tips:

1. Wheel height is different than setup station height

image

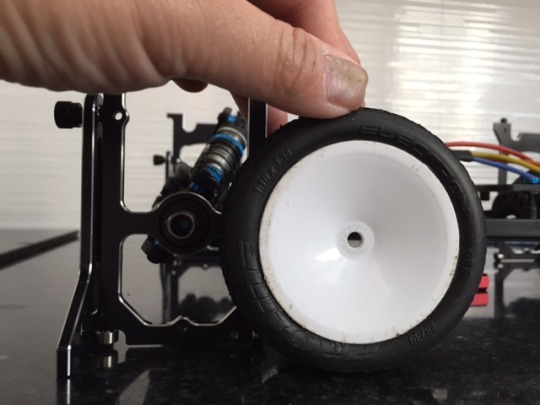
The height of the axles is usually going to be higher than your actual wheel height.  In the case of my B6 with Pro-line Electron tires, the HUDY has my car’s front axles suspended about 4mm higher than it would be with the wheels mounted.  Measure the height of the HUDY axle mounting points, and then measure the radius of your wheels to see what the difference is.  That’s your height difference number.

So to set your toe and camber, you’d want to add that to your ride height gauge.  For example, I run my B6 at 23mm ride height front and rear, so I measure the front with a 27mm ride height gauge under the car and then check toe and camber.  In the back, my buggy is about 2mm higher in the station, so I stick a 25mm gauge under the rear when setting camber.  This will approximate the 23mm normal ride height I run in the rear.


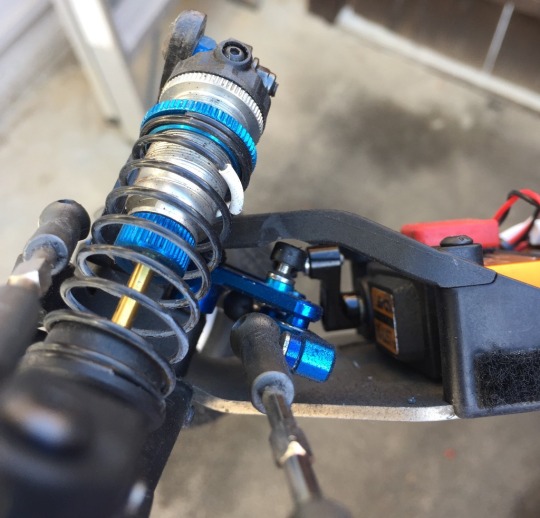
2. Use a flat ride height gauge

image

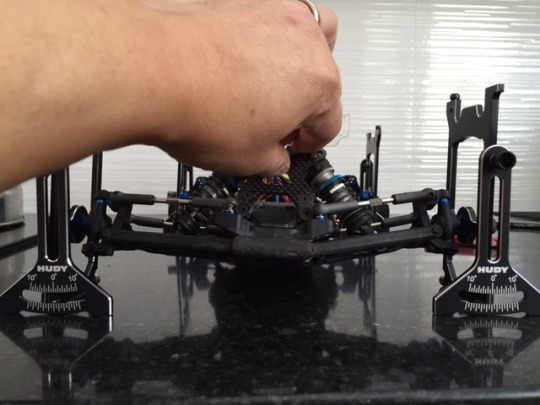
I like the 110% Racing ride height gauges, but they only set the height at a single pinpoint.  When you’re pushing down on your car to set the ride height before measuring, you want to use something flat so that you don’t get any left-right tilt.  In this example, you can see when I push down on the buggy, the right side is more angled than the left, which is totally going to throw off your measurements!

You need your chassis completely level when measuring.

Tuesday, September 6, 2016

Tamiya Hornet: Grasshopper rear pivot conversion

One of the main differences between the Hornet and the Grasshopper is that the latter uses a fixed pivot in the front of the rear drivetrain while the Hornet uses a full-floating rear axle.

The entire rear drivetrain is one big, heavy unit.  It’s got the motor, wheels and tires, differential and rear axle on there as one big chunk of metal and plastic.

image


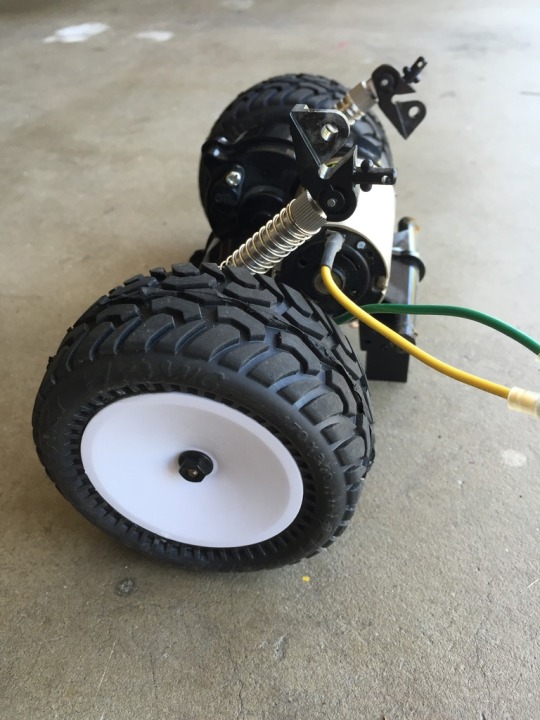
But the biggest issue is that it’s 500 grams of unsprung weight!  This means every time the rear wheels hit a bump, the entire half kilogram weight is knocked around.  Force = mass x acceleration, so that’s a lot of force being applied to the buggy.

image


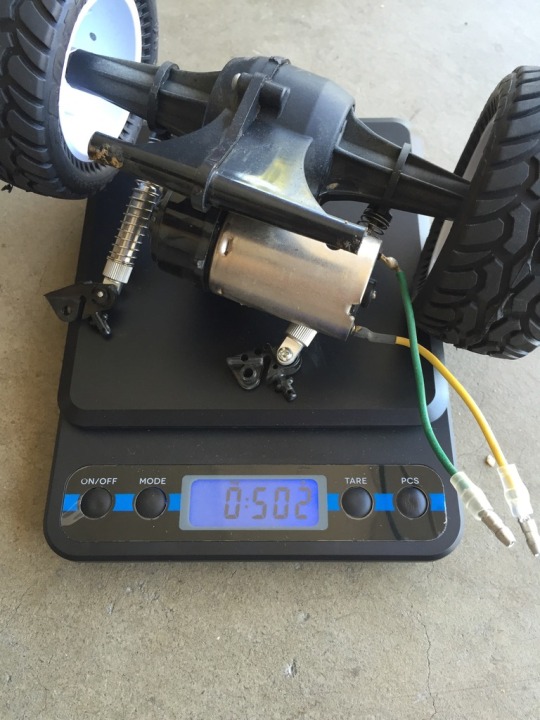
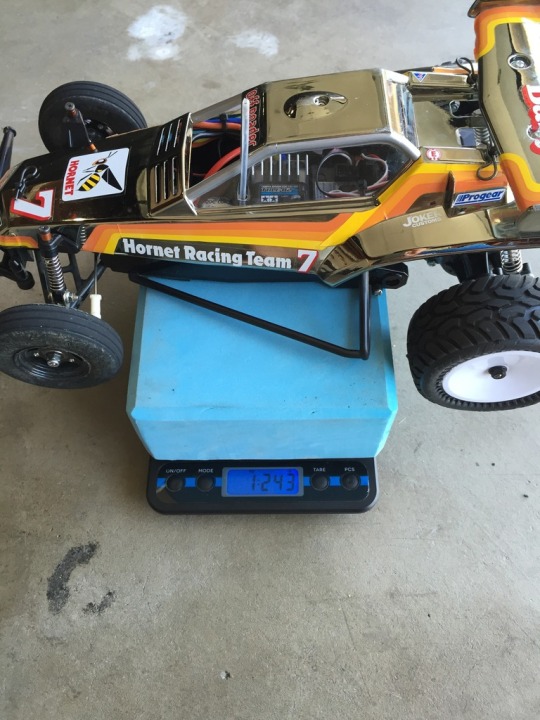
The entire buggy only weighs about 1200 grams (with battery), so you’re talking 40% of the entire mass of the buggy is getting knocked around and disrupting the entire chassis.  What you have, is a case of the tail wagging the dog. When the tail weighs as much as the dog, there’s not a lot you can do to isolate the tail’s movement from the dog.  So what ends up happening is the rear drivetrain unit acts on its own, and there’s not a whole lot the chassis can do to dampen the jostling.

image


One of the “improvements” Tamiya made for the Hornet, was to implement a free-floating rear end, so that this whole drivetrain can move in any direction.  This is supposed to give it more suspension action, and I suppose it might give slightly better traction in loose conditions, but overall it makes the rear end very bouncy and very erratic.  Here’s a clip showing the completely free-floating rear end that can turn in basically any direction.

http://vid1238.photobucket.com/albums/ff497/captainr22/58A4F2EB-EC3E-4595-9EE1-2EDEAD2403C5.mp4


The original Grasshopper uses a fixed pivot point, so that any movement is limited to the up-and-down direction with the shocks.  It isolates the rear a bit more and makes it more controlled.  Personally, I think this is a superior design.  So I modified my Hornet with the Grasshopper pivot points, Tamiya part number 0005069 (Grasshopper parts tree “B”).  It’s an easy modification, you just remove the sliding rod and put on the Grasshopper mounts on each side.

http://vid1238.photobucket.com/albums/ff497/captainr22/DCE700B3-28F4-4637-8B58-79DA671589B3.mp4

This keeps the rear end a little more predictable and not hop around so much.  The downside is that there is absolutely no rear roll at all, but I find the straight-line suspension to work much better and the rear end more stable.  The car wanders less and is overall a more reliably handling buggy.