This is my first Tamiya. I always wanted a Grasshopper or Frog when I was kid, but never got one, so I missed out on the whole Tamiya RC craze of the 80′s. Fast-forward 30 years with kids of my own and a slight modernization of a classic, and here we are.
I picked up a Tamiya Hornet re-release as a summer project for the kids. Well, they ended up only building about 25% of it and I built the rest, but at least they can read directions and know how to snip parts off trees and such. I picked the Hornet over the other classic early Tamiya buggies because
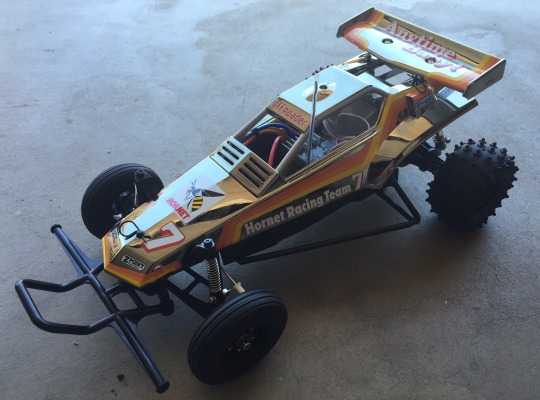
it had a few of the features I was looking for in an RC kit for my kids – bathtub body, a robust transmission, and economically priced. Looking at the different versions, I decided on the 40th anniversary Black Metallic edition, because it had a few upgrades that were worth it (brushless ESC, black wheels) and came in this unusual pre-painted black metallic color.
The paint is basically a black chrome color and looks a little bit different, depending on the lighting. It’s kind of a pale gold color, but can look silvery-titanium or black, depending on the lighting.
In the shade it looks a titanium-gold color.
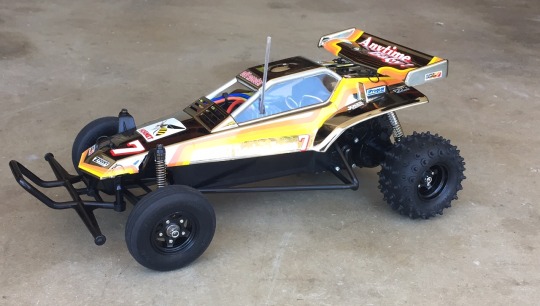
In bright sunlight or in low-light it looks black.
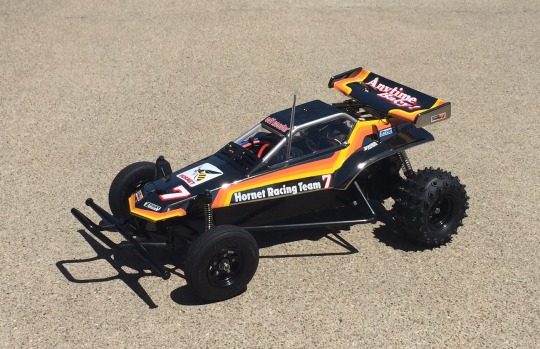
I wasn’t too sure of the color, because it looks gray online, but it actually looks pretty nice stickered up. Definitely a neat color.
Overview:
Tamiya has re-released most of their classic RC cars, and the Hornet was one of their best sellers. It’s essentially a Grasshopper with some upgrades, namely a hotter motor, lightweight Lexan body and better rear shocks. With the re-release, you get an ESC and some minor chassis and body changes, but they are pretty close to the original versions.
Build: 5
The build was mostly straightforward. Tamiya has a bit of a confusing parts layout, I ended up dumping everything in a Tupperware container and pulling parts as I needed them. The plastics are on the soft side, and you have wood screws tapping into plastic, so not the most robust design, but it works. For whatever reason, I didn’t find the instructions quite as straightforward as TLR or Associated instructions – they have a confusing parts tree identification system, and some of the metal spacers were nearly identical in size and shape, so it was hard to tell them apart. They do include a nice 1:1 key for parts, so that was nice in trying to match screws to the ones in the diagrams.
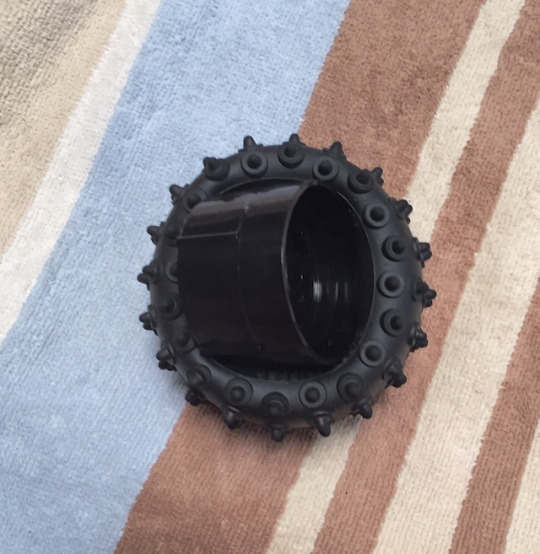
The only part that was really difficult was the rear tires. They are a 3-piece design, where you have to put a fairly big center hub into the middle of the tire that has a much smaller hole. There’s no way a kid could do this. See my tips section below for some suggestions on making this go more smoothly.
The stickers will affix to a plain black body, but the decals aren’t pre-cut. It took me about an hour to affix the decals.
Performance: 3
This is not a performance buggy. I’m not sure it was state-of-the-art back in 1984 either. As near as I can tell, the Brat/Frog came out first with independent suspension and a space frame, and then Tamiya decided to come out with a simpler and cheaper buggy – the Grasshopper. The Hornet is basically a higher-spec Grasshopper, but not by much.
The main area the buggy lacks is in the suspension department. Up front, you have very narrowly set front arms with friction dampers and no camber adjustment. The friction dampers are basically shocks with a metal shaft sliding through greased O-rings. Stiction is terrible with the O-rings, the springs are way toostiff, and you get dirt all over the dampers which binds things up more.
The rear, surprisingly, is even worse. You have a live axle with transmission and motor mounted as a one-piece unit in some sort of sliding pivot system. The Hornet has oil-filled dampers, but the front of the rear assembly is not fixed, so the whole rear end ends up bouncing around.
On a smooth surface, the suspension is adequate, but on any sort of bumpy surface, fugghedaboutit. In short grass, the buggy was knocked around a lot and had a tendency to flip. Drive this on pavement or smooth dirt.
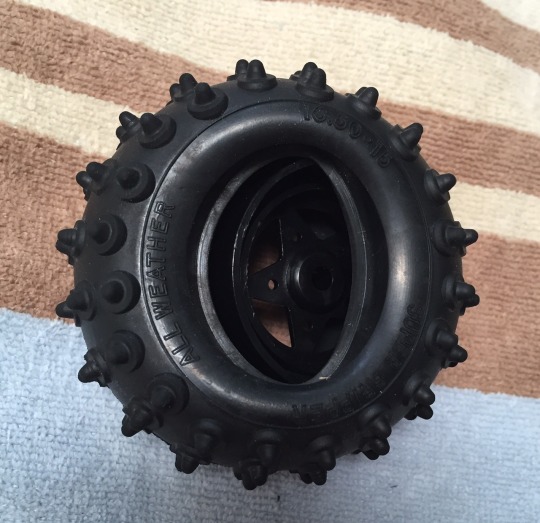
On the plus side, the soft, air filled balloon of a rear tire actually provided pretty good traction in the baseball diamond I was running at. The front ribbed tires also stuck pretty well. I think the rear tires are so soft, they actually make up for some of the suspension issues.
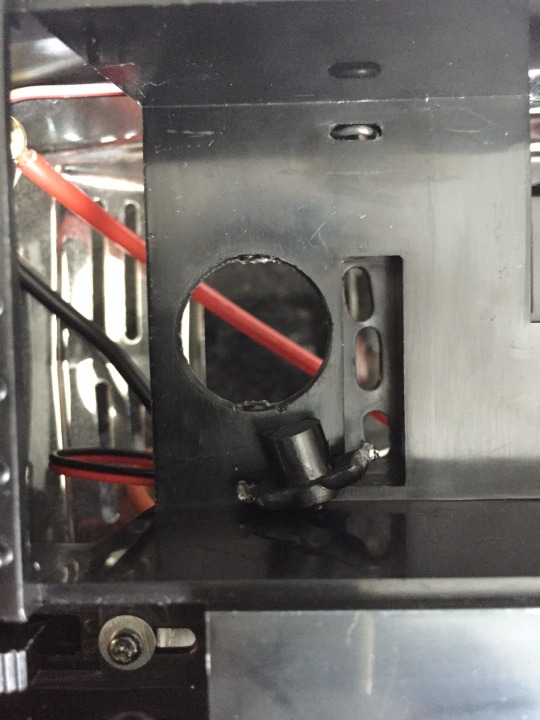
The electronics also worked well – the ESC works with a brushed or brushless motor, and the Mabuchi 540SH motor is fine for a solid amount of speed. It’s not fast, but more than adequate for the type of car it is.
Drive this buggy for fun, and reminisce about the 80′s while you’re doing it.
Durability: 5
I didn’t crash my buggy much, just hit the side of the backstop a couple of times and flipped it a few times, and nothing broke. If you drive this buggy in the environment in which its intended (an open dirt field, baseball diamonds, etc.), it should be fine. The steering tiedrods are laughably weak (basically thin wire) and the plastics seem a bit soft, but parts are cheap and it’s known for being relatively durable, so it should be OK.
The transmission is all plastic, but the gears are quite beefy. I’m not sure it would hold up to much more than a brushless 21.5t or 17.5t motor, but it ran fine on my 2 cell Lipo with the stock brushed motor.
Value: 10
This buggy is pretty darn inexpensive. I got mine for $115 shipped from Tower, and that included an ESC, brushed motor, wheels and tires! I used a leftover plastic Traxxas receiver from a Stampede 4x4 and a Sanwa receiver, and it was good to go. You can’t get that kind of value nowadays! I don’t think the price has changed in 30 years, despite inflation, and that is pretty
remarkable.
Support: 7
This buggy has been around for a long time, and Tamiya seems to still support the re-releases, so parts are still available. I’m not sure that will always be the case, but it’s one of the longest running RC cars out.
There aren’t a whole lot of upgrades still available, but I was able to get a hex conversion for the rear tires. The main issue with support is that there aren’t a lot of aftermarket wheels and tires designed to
work for this buggy, so some work is involved if you want choices in rubber.
Not a lot of online or local stores carry Tamiya parts, but you should be able to order parts from Tamiya USA directly.
Dislikes:
Overall I like the buggy a lot. I don’t bash much, so I’m not sure this buggy will see much
action, but I enjoyed the build and the nostalgia factor. The stuff I didn’t like was the rear tire build, but if you take the buggy for what it is (a trip down memory lane), it’s fun.
The handling is poor, and the steering radius is pretty limited. But this is a basic entry-level buggy from the 80′s.
Conclusion:
The Hornet re-release is a great value and an easy build. Performance is still stuck in the 80′s, but if you’re looking for a cheap starter kit to relive your youth or something fun to build with the kids, I think the Hornet is a great choice. Drive the buggy as a basher in some smooth dirt, and you’ll have a great time.
If you’re looking for an inexpensive kit with better performance, the Tamiya Neo Buggy Fighter is a good choice. It’s an evolution on the Grasshopper/Hornet family, with better performance for about $100.
Build Tips:
- Lipos
- Rear tires:
Start with the hub sideways and push it in as far as it will go.
Work one side of it in, and try to get the lip of the tire over the lip of the wheel. I went on the raised edge, but in retrospect the other lip of the wheel (fliping the whole wheel around) would have been easier.
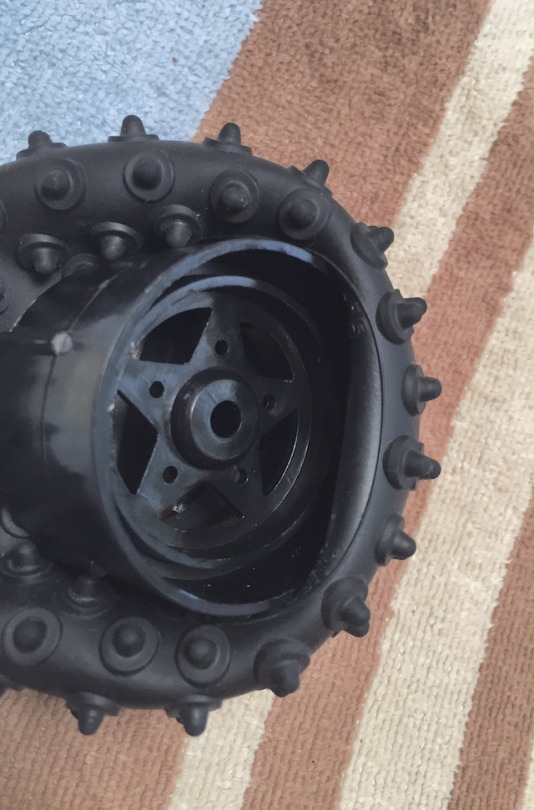
Continue around working the lip of the tire over the lip of the wheel. Don’t worry about the far side of the tire, even if it starts inverting.
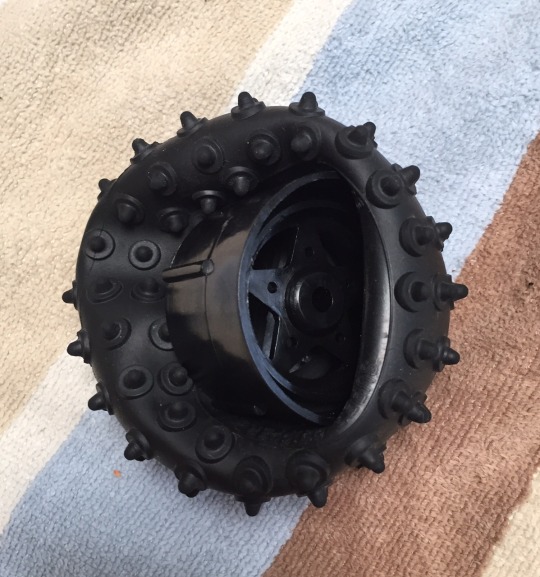
Get the entire wheel into the cavity of one side of the tire, and you’re basically done. Now have a beer and take a break and rest those fingers!
No comments:
Post a Comment
Note: Only a member of this blog may post a comment.